It has been a long time since I have posted anything on my project.
I think it’s really coming together. Let’s see what you think. I have been cutting and brazing for the better part of the year when I have time to spare.
And I’ve made the bottom of the ship as well. Although, I was a little off in my measurements which I think I will use JB Weld to fill the gaps.
I have also been making mounts for the components.
Power supply mount
Lines up alright
Beautiful
A filing we go!
Lots of effort
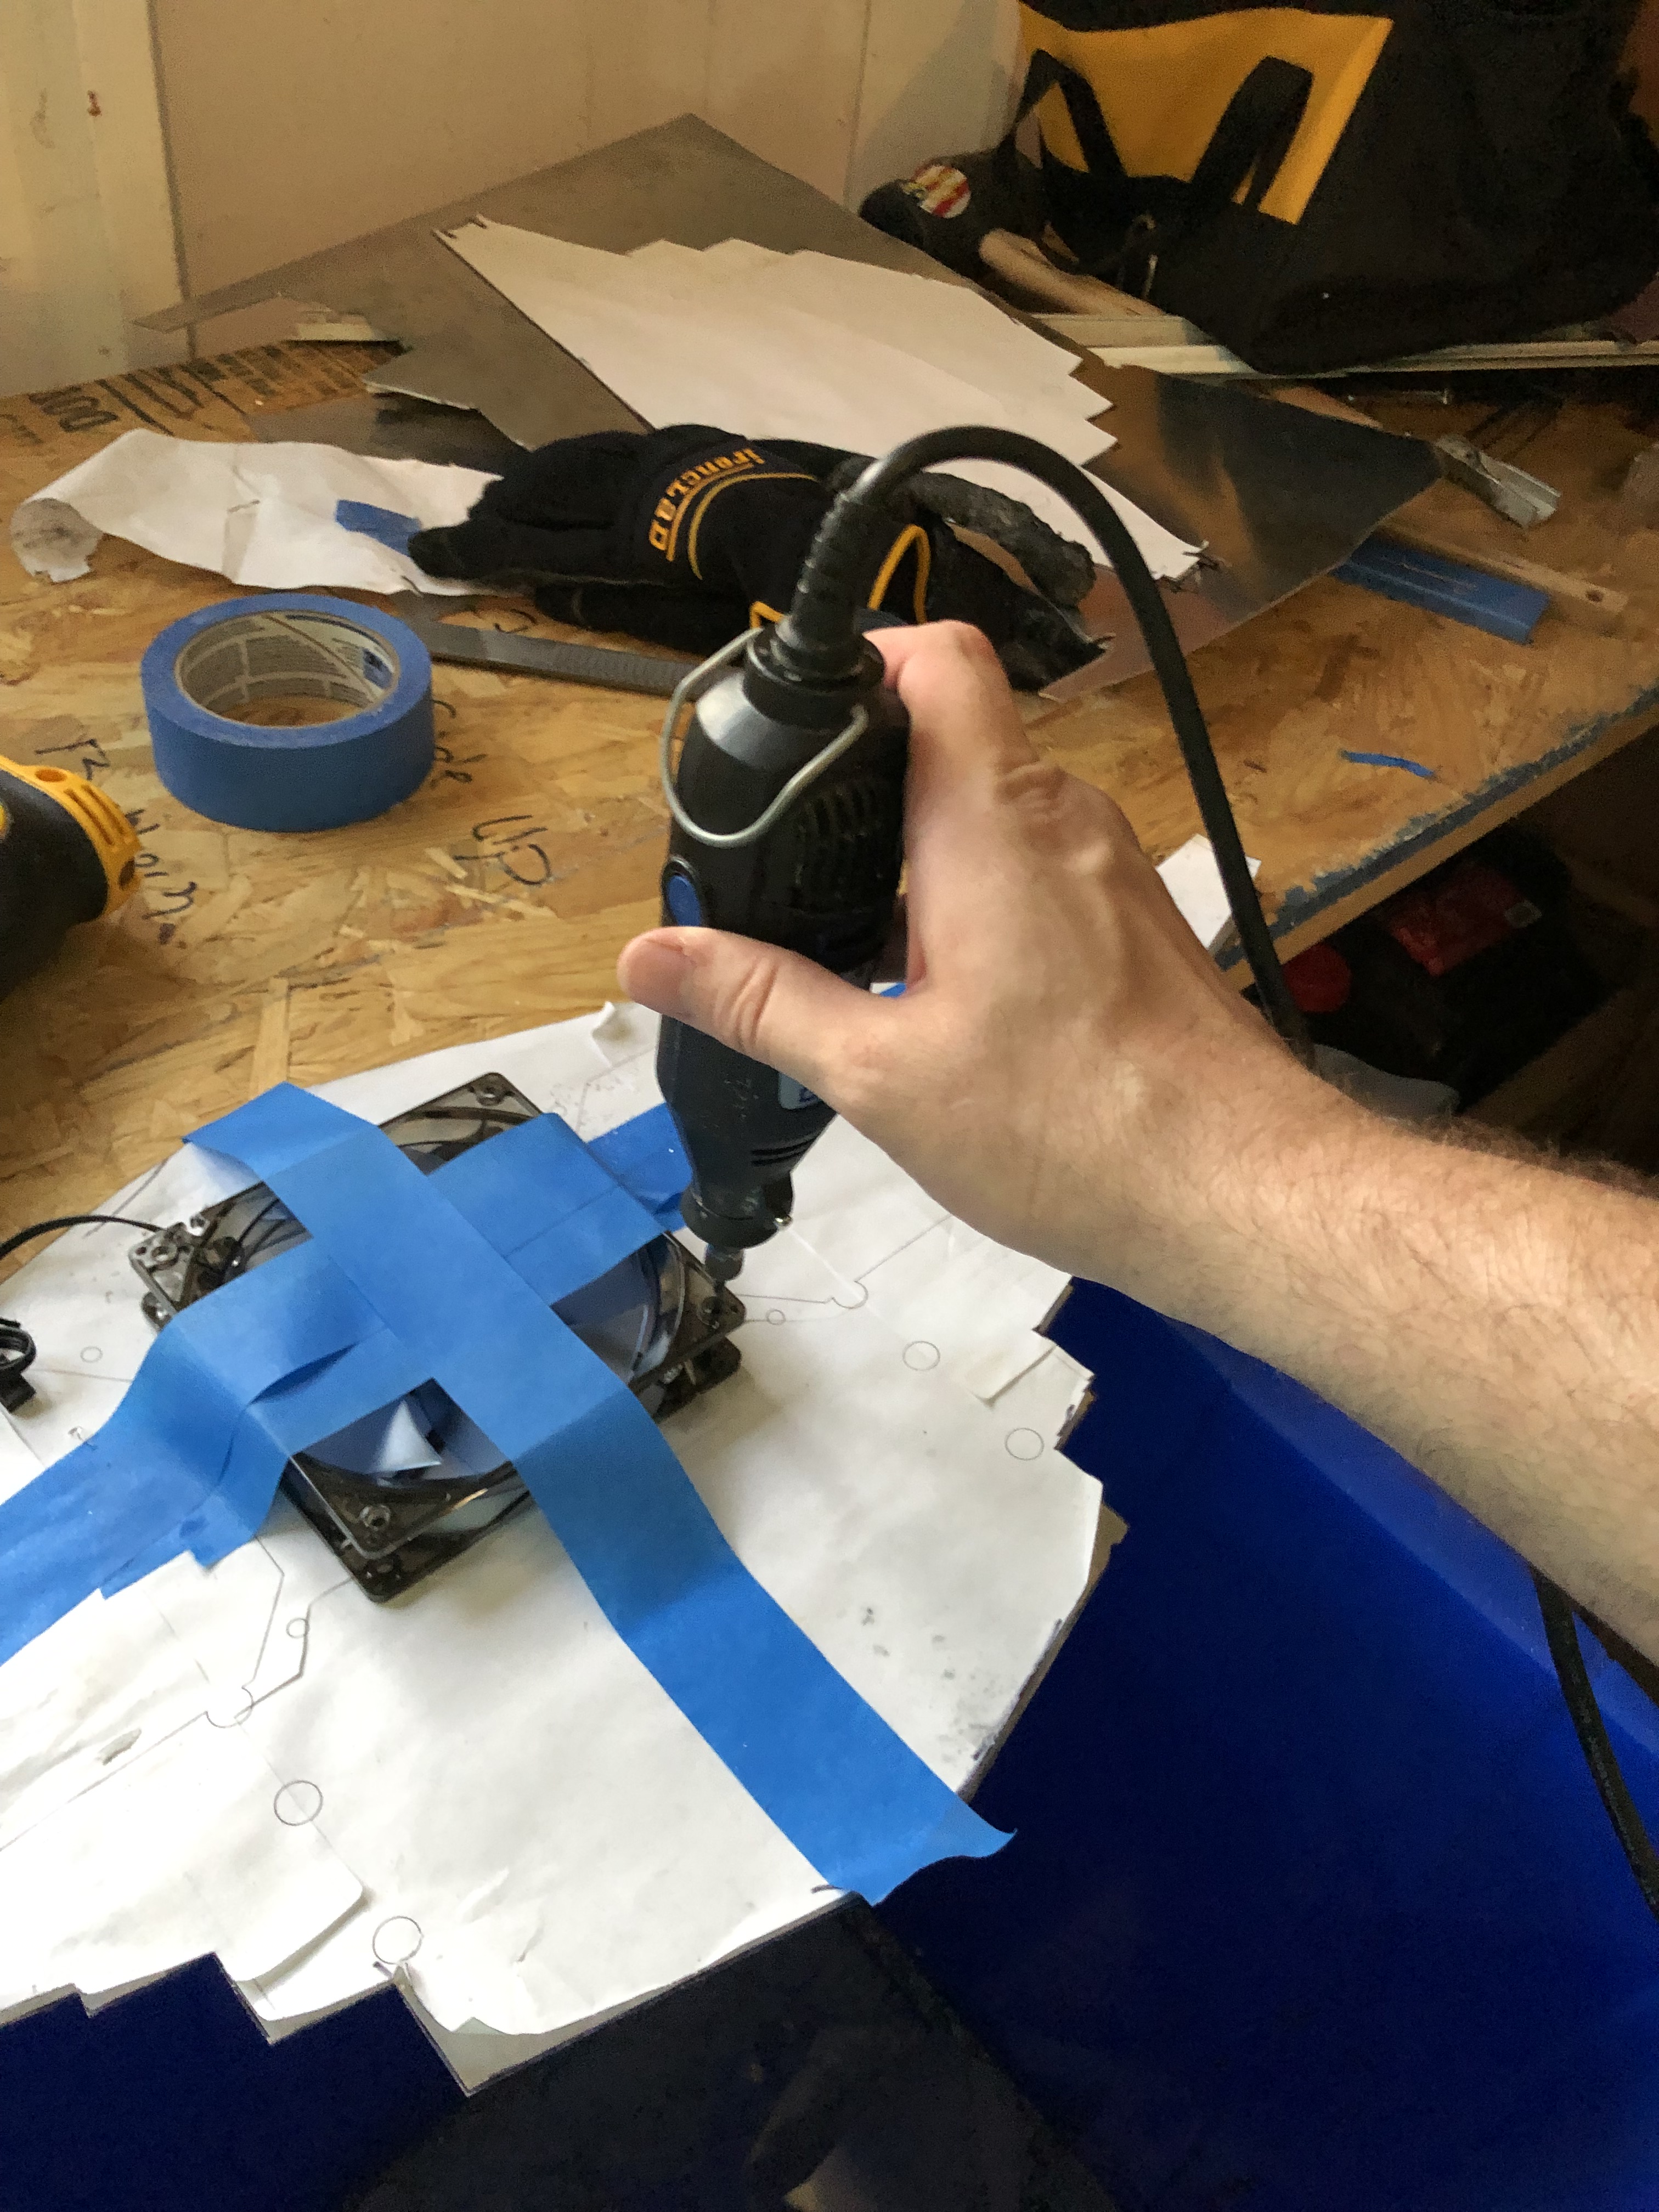
Making vent holes for the PSU intake
Eyeballing it
I was a little off
Put one on top of the other
Make them the same
File File File
Looking good
After riveting
Mounting and remounting to make it even on the sides.
PSU mount location
Ready for the motherboard mount!
Just today I finished the motherboard mount bracket.
Ready to braze
Came out good
Getting a lot better at brazing
Looking really good and it’s actually solid
It was still really HOT when I took the picture hence the welding gloves…
So I am making steady progress. I am thinking of using clear acrylic for the top mid section so you can look in and see the hardware and maybe some RGB?…..
I finished my model! Now I have a reference for all the details and measurements for my computer tower. I think it looks really good!
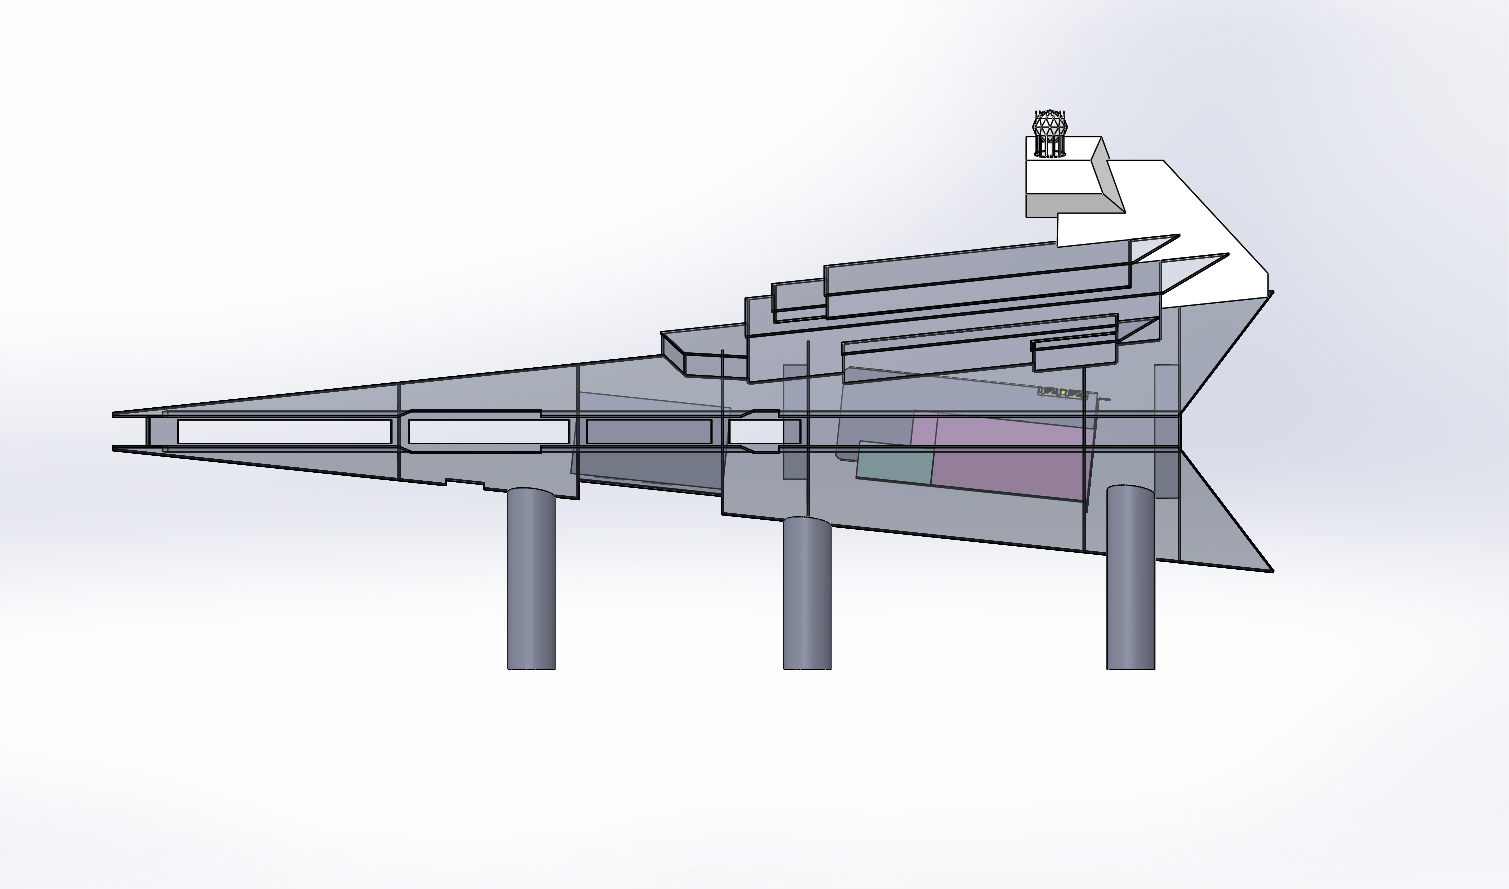
I have also been playing around with my CAD model. Making some progress and simplifying the design. I have tailored the design to the materials I can readily access/purchase.
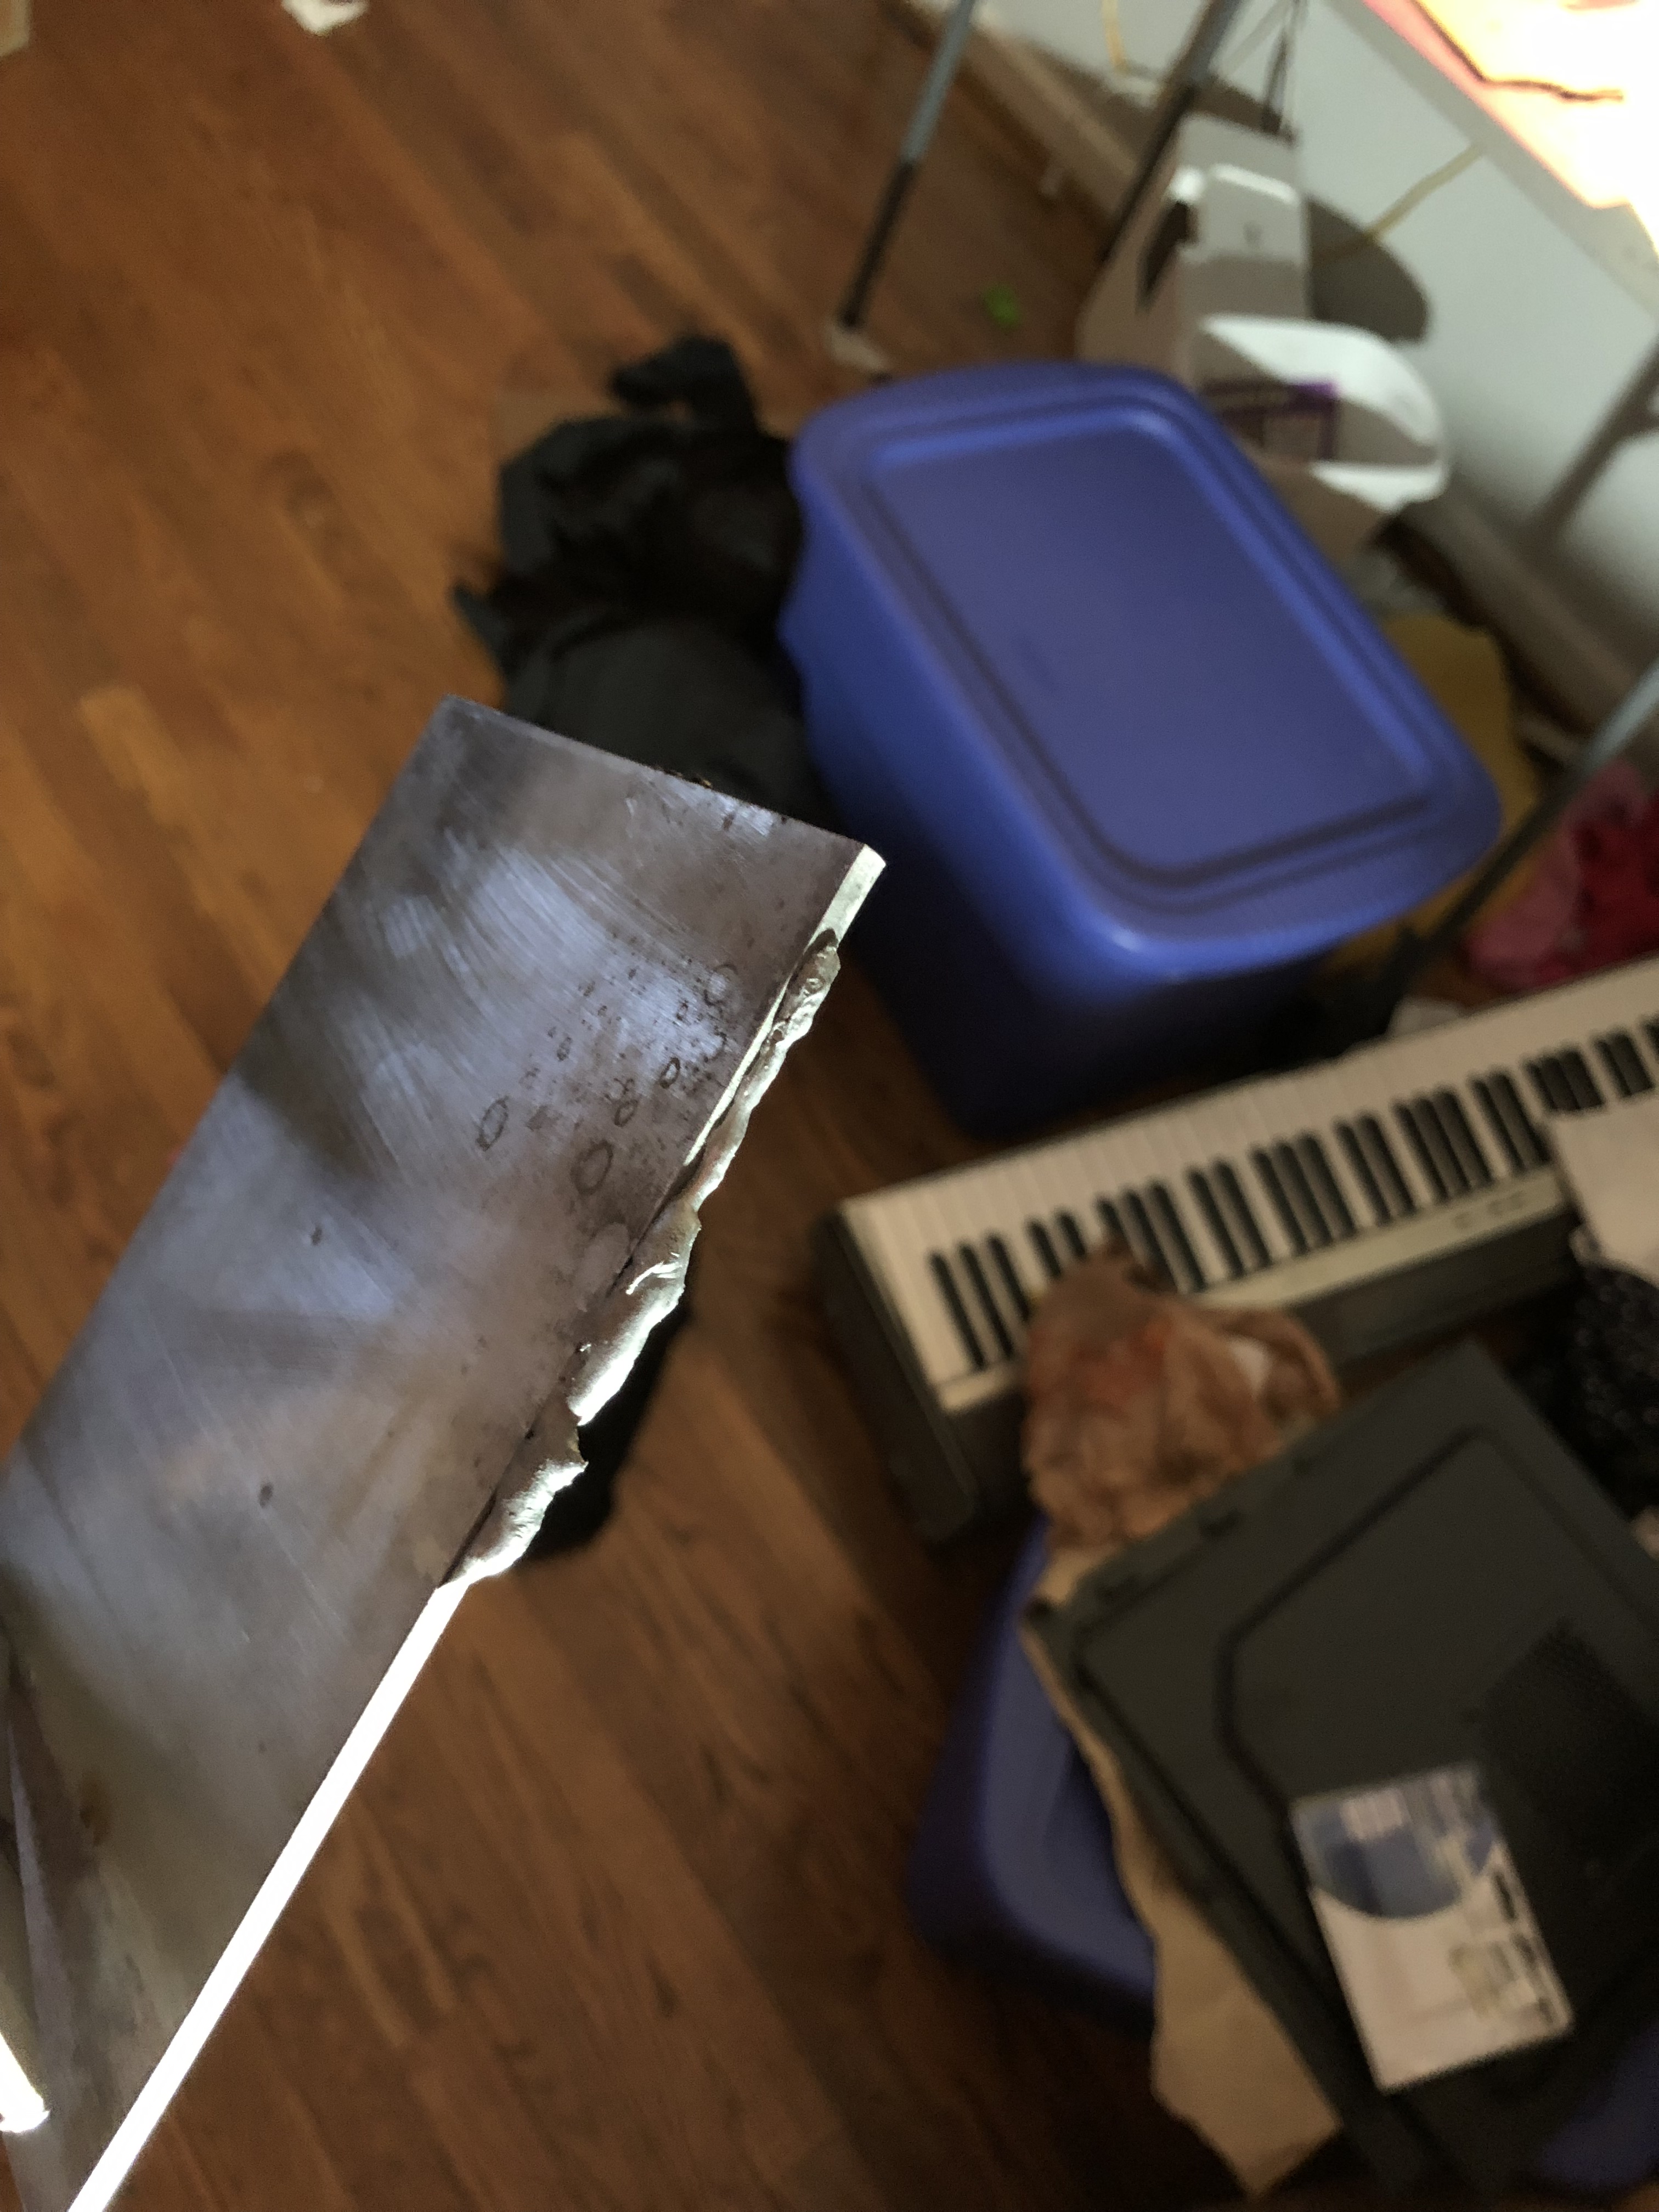
I went to the Metal store around here and bought some channels. Brazed them together as well. The channels were like 20 bucks so not too bad.
I probably could have done a better job, but I had to heat the metal up a lot to get it hot enough for the braze. Heating up the other side melted my braze, so I guess I will have to cover it up. I think the braze on the one side will hold well though…hopefully.
Well, I went back the metal store and asked about CNC water jetting. They came back with a quote. ~200 bucks for a 4′ x 8′ sheet of 6061 aluminum and $800 for the CNC work. That seemed a little ridiculous since I gave them the CAD files. So I had them cut it in two 18″ strips and two 30″ strips. I figure I can try to cut it myself with a nibbler. So, I bought a nibbler attachement for my drill for 40 bucks. I should have enough leftover to finish the lower shroud as well, maybe even the whole thing! Let’s see if that will work. The nibbler just arrived today so I’m excited!
Over the past month I have been working on the SolidWorks model and my Zvesda Model. I also tried to braze aluminum today. Some things went well, others didn’t turn out so good. First an update on my CAD model.
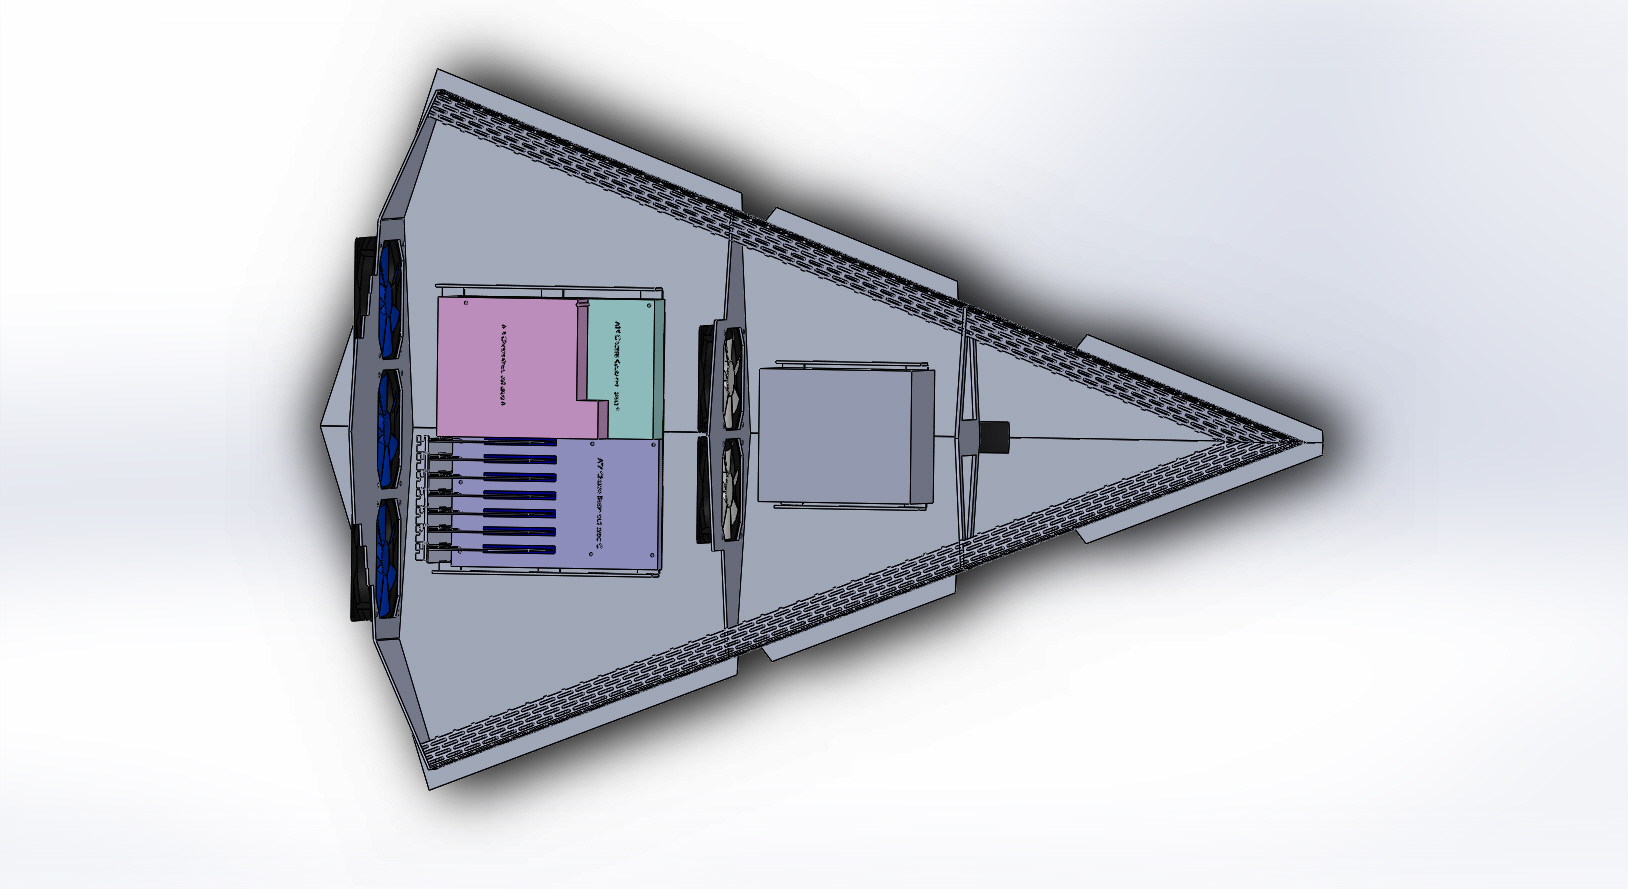
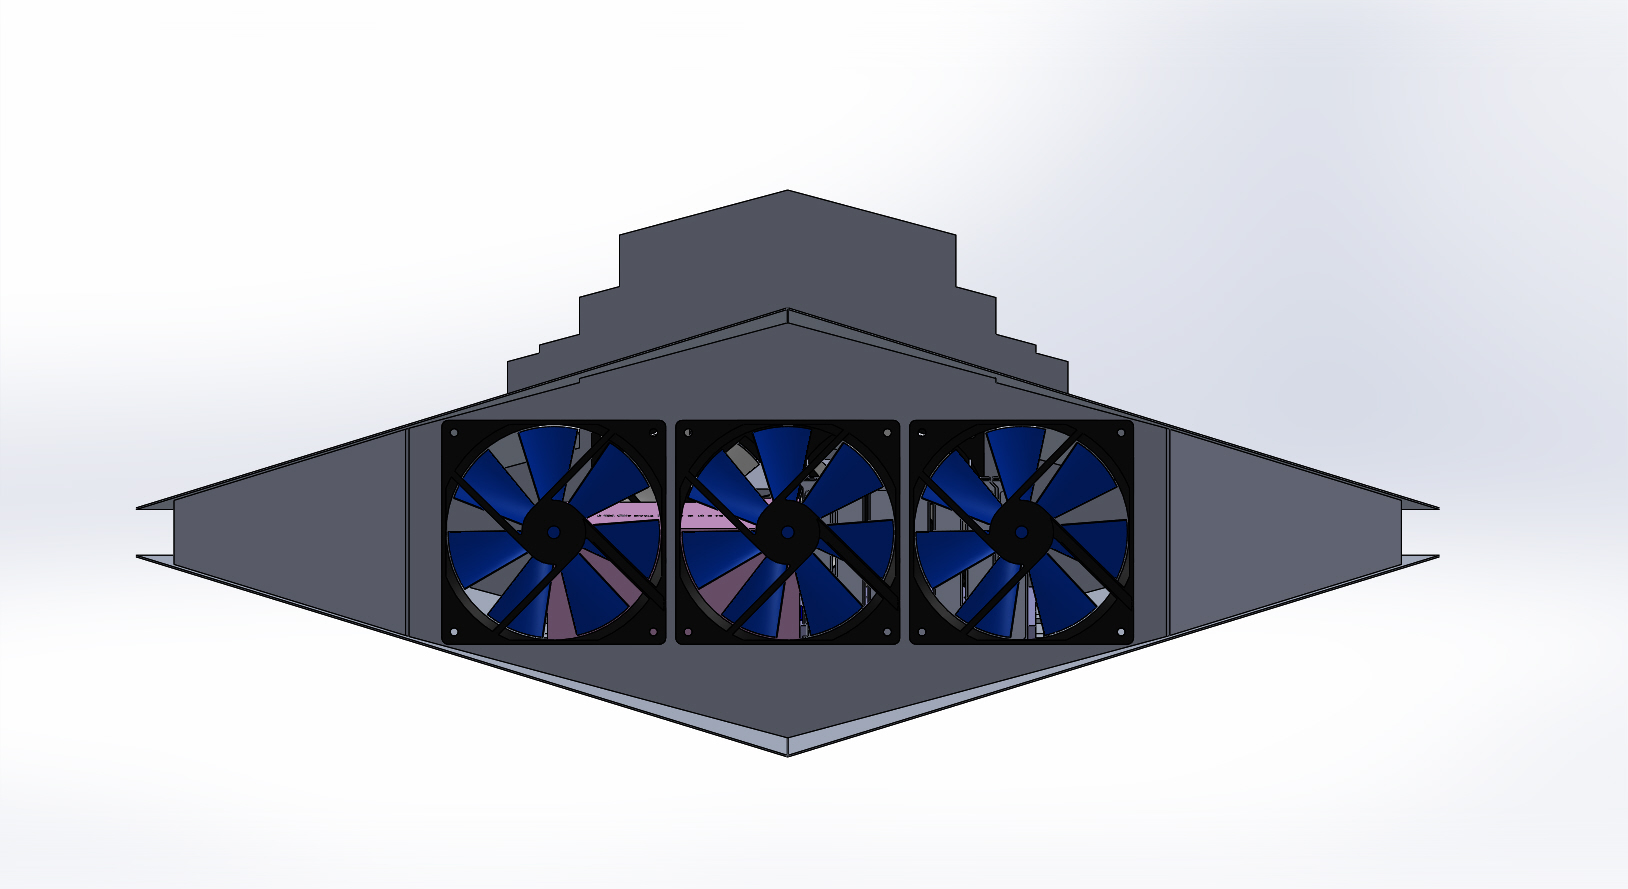
I went ahead and modeled a 120mm fan and a 140mm fan to see how they would look. in the pictures I have 2 120mm fans in front and 3 140mm fans behind the current configuration is sucking air in the back and blowing it out the front.
I placed the PSU up front since there is so much dead space up there. I will probably make the bridge portion from a 3d printer. Everything you see here will be aluminum. I also simplified the support beams running through since it would have been really hard to position all those pieces for brazing with what I have at home. All I really need is a bit thicker aluminum to support the thinner aluminum I am using for the “skin”. I am just going to braze 1 in bars to sit the motherboard tray and PSU in. With the current configuration, I should be able to fit in a fairly large video card as well.
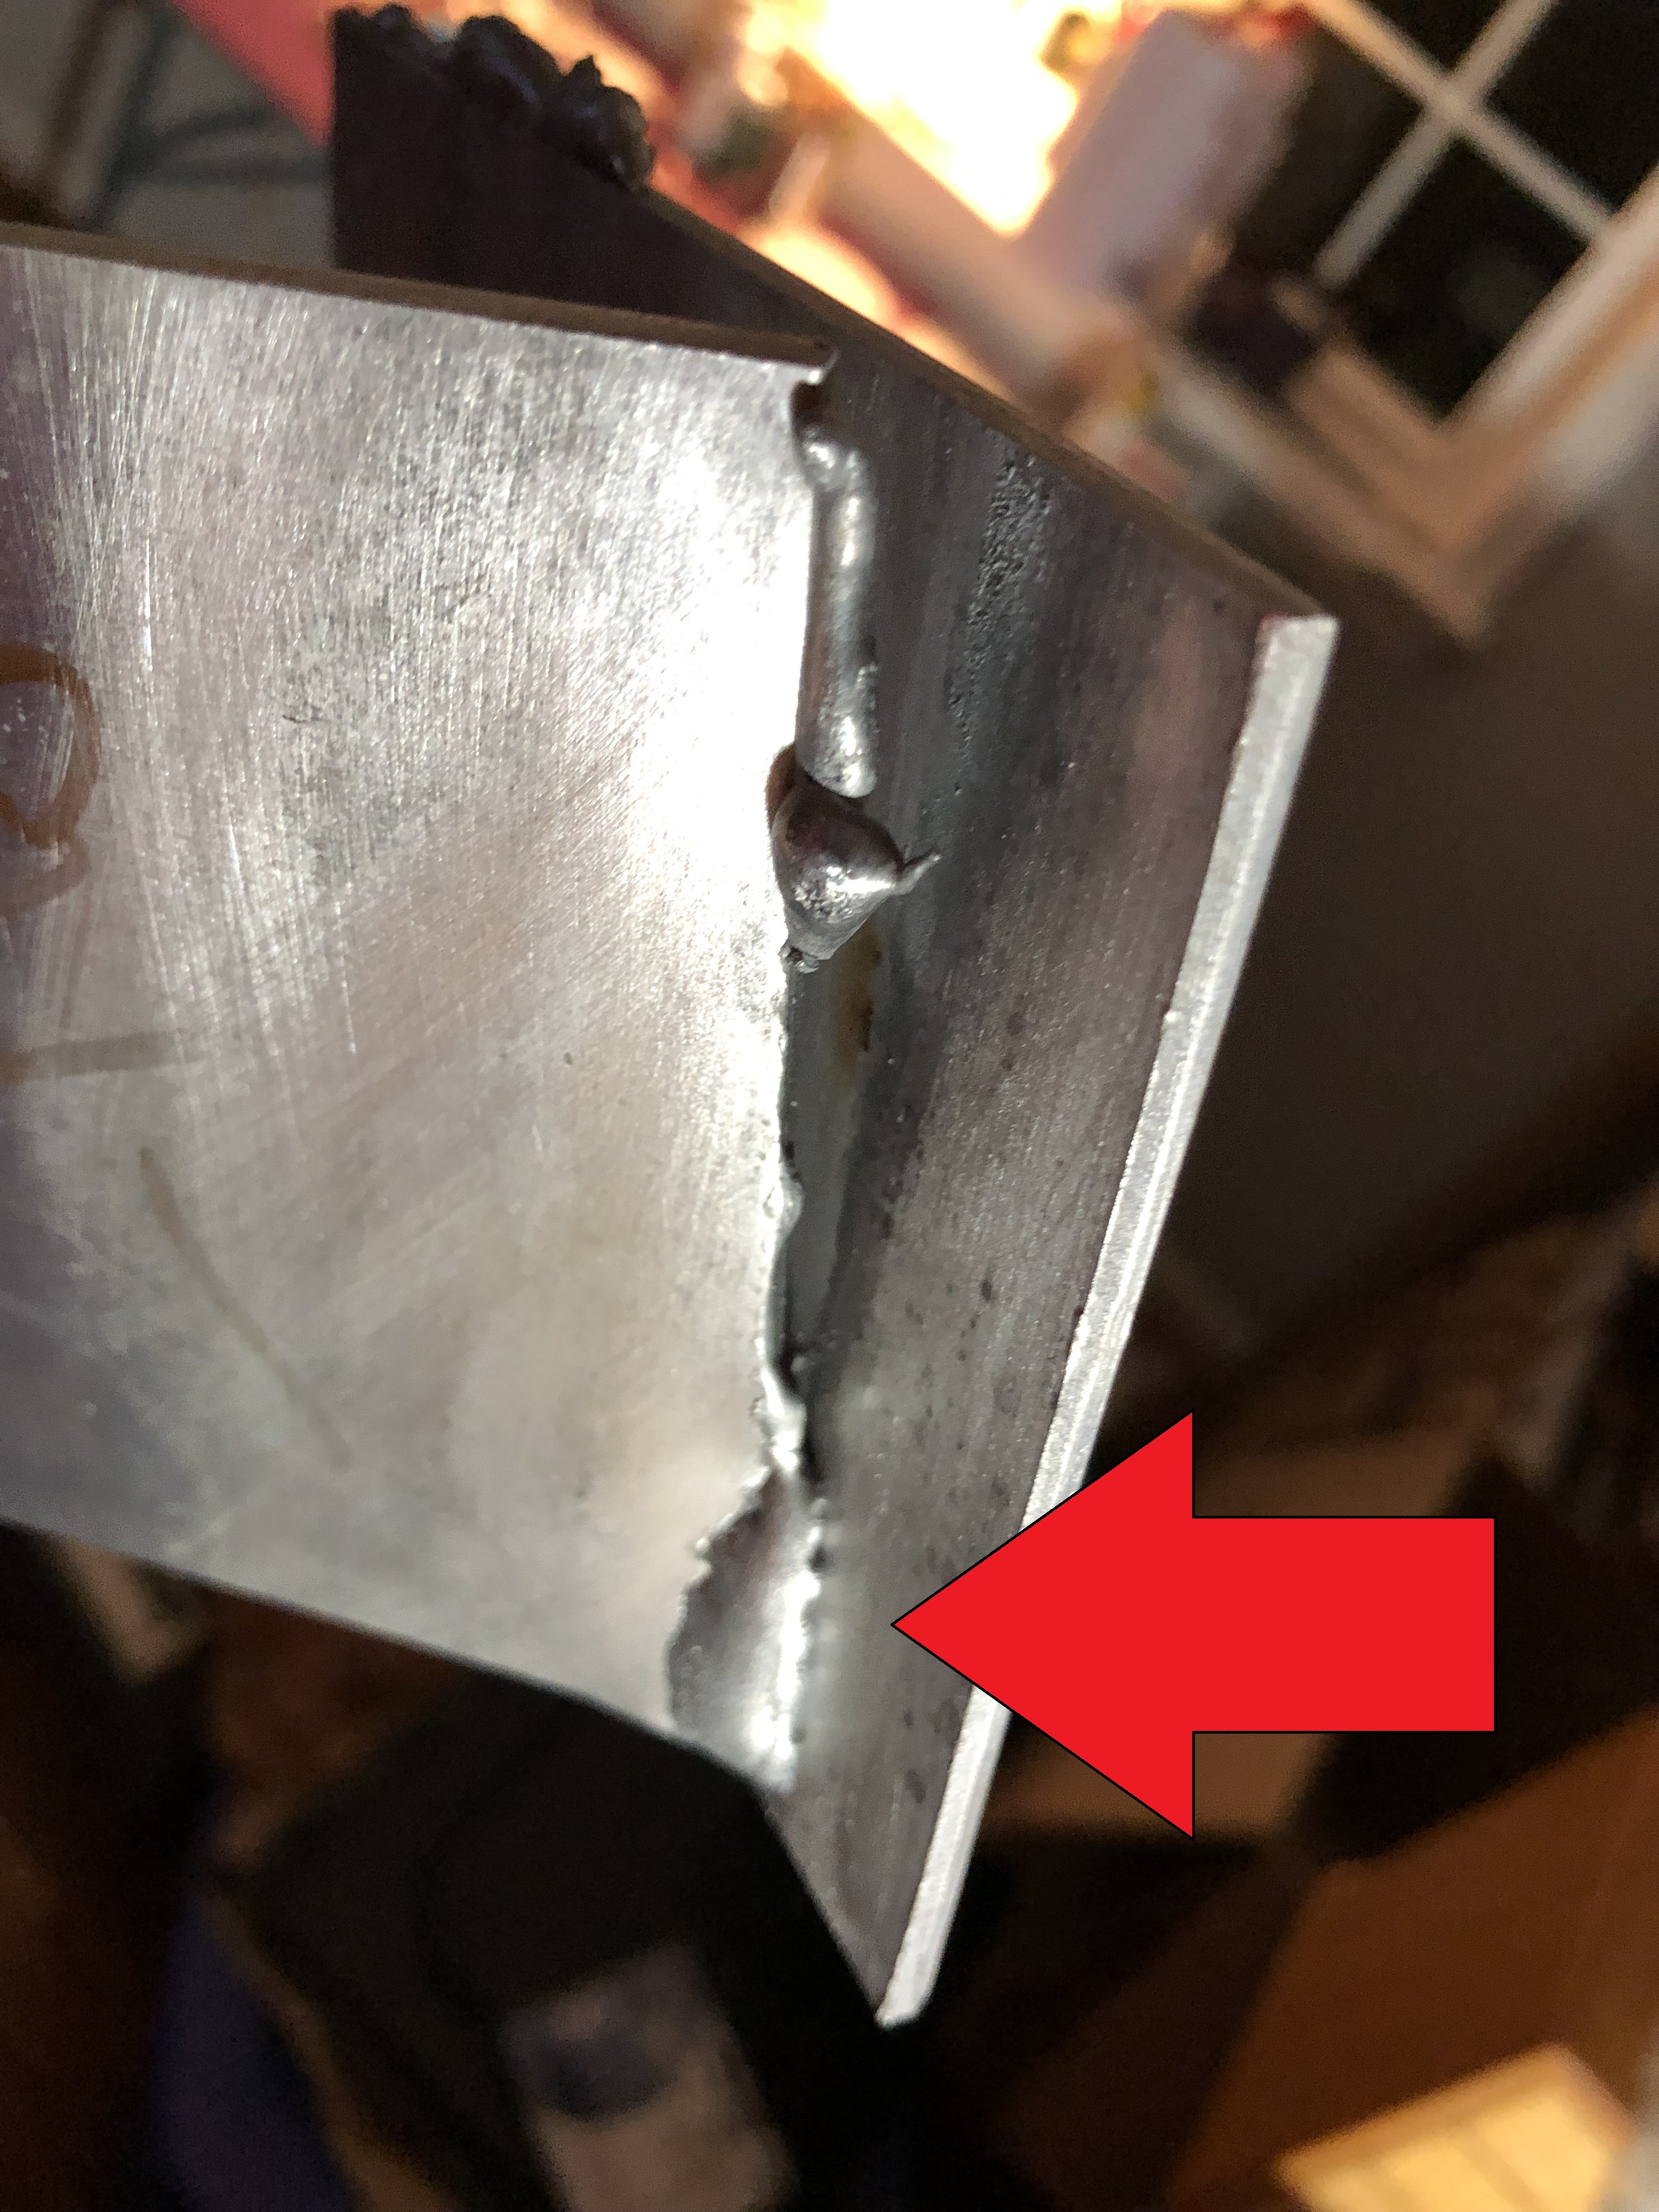
All my fun designing won’t get me too far unless I learn how to build it and make it look good. And we come to the part where I am still learning. I said before I got some scrap aluminum from a metal retailer. I made my first attempt at brazing today.
Attempt #1 failed
5052 is harder to braze (as I have read on the internet). I am using a MAPP torch with some brazing flux. I tried again with slightly better results.
Look! It’s actually stuck together!
Although I was trying to get the entire seam to braze together, I did get them to stick together somewhat and the bond is very strong (although really ugly). The spot where it bonded is where the flux didn’t all blow away before it could melt. I need to thing of how to keep the flux there because every time I bring the torch to bear, it just blows the flux away. Practice, practice I guess.
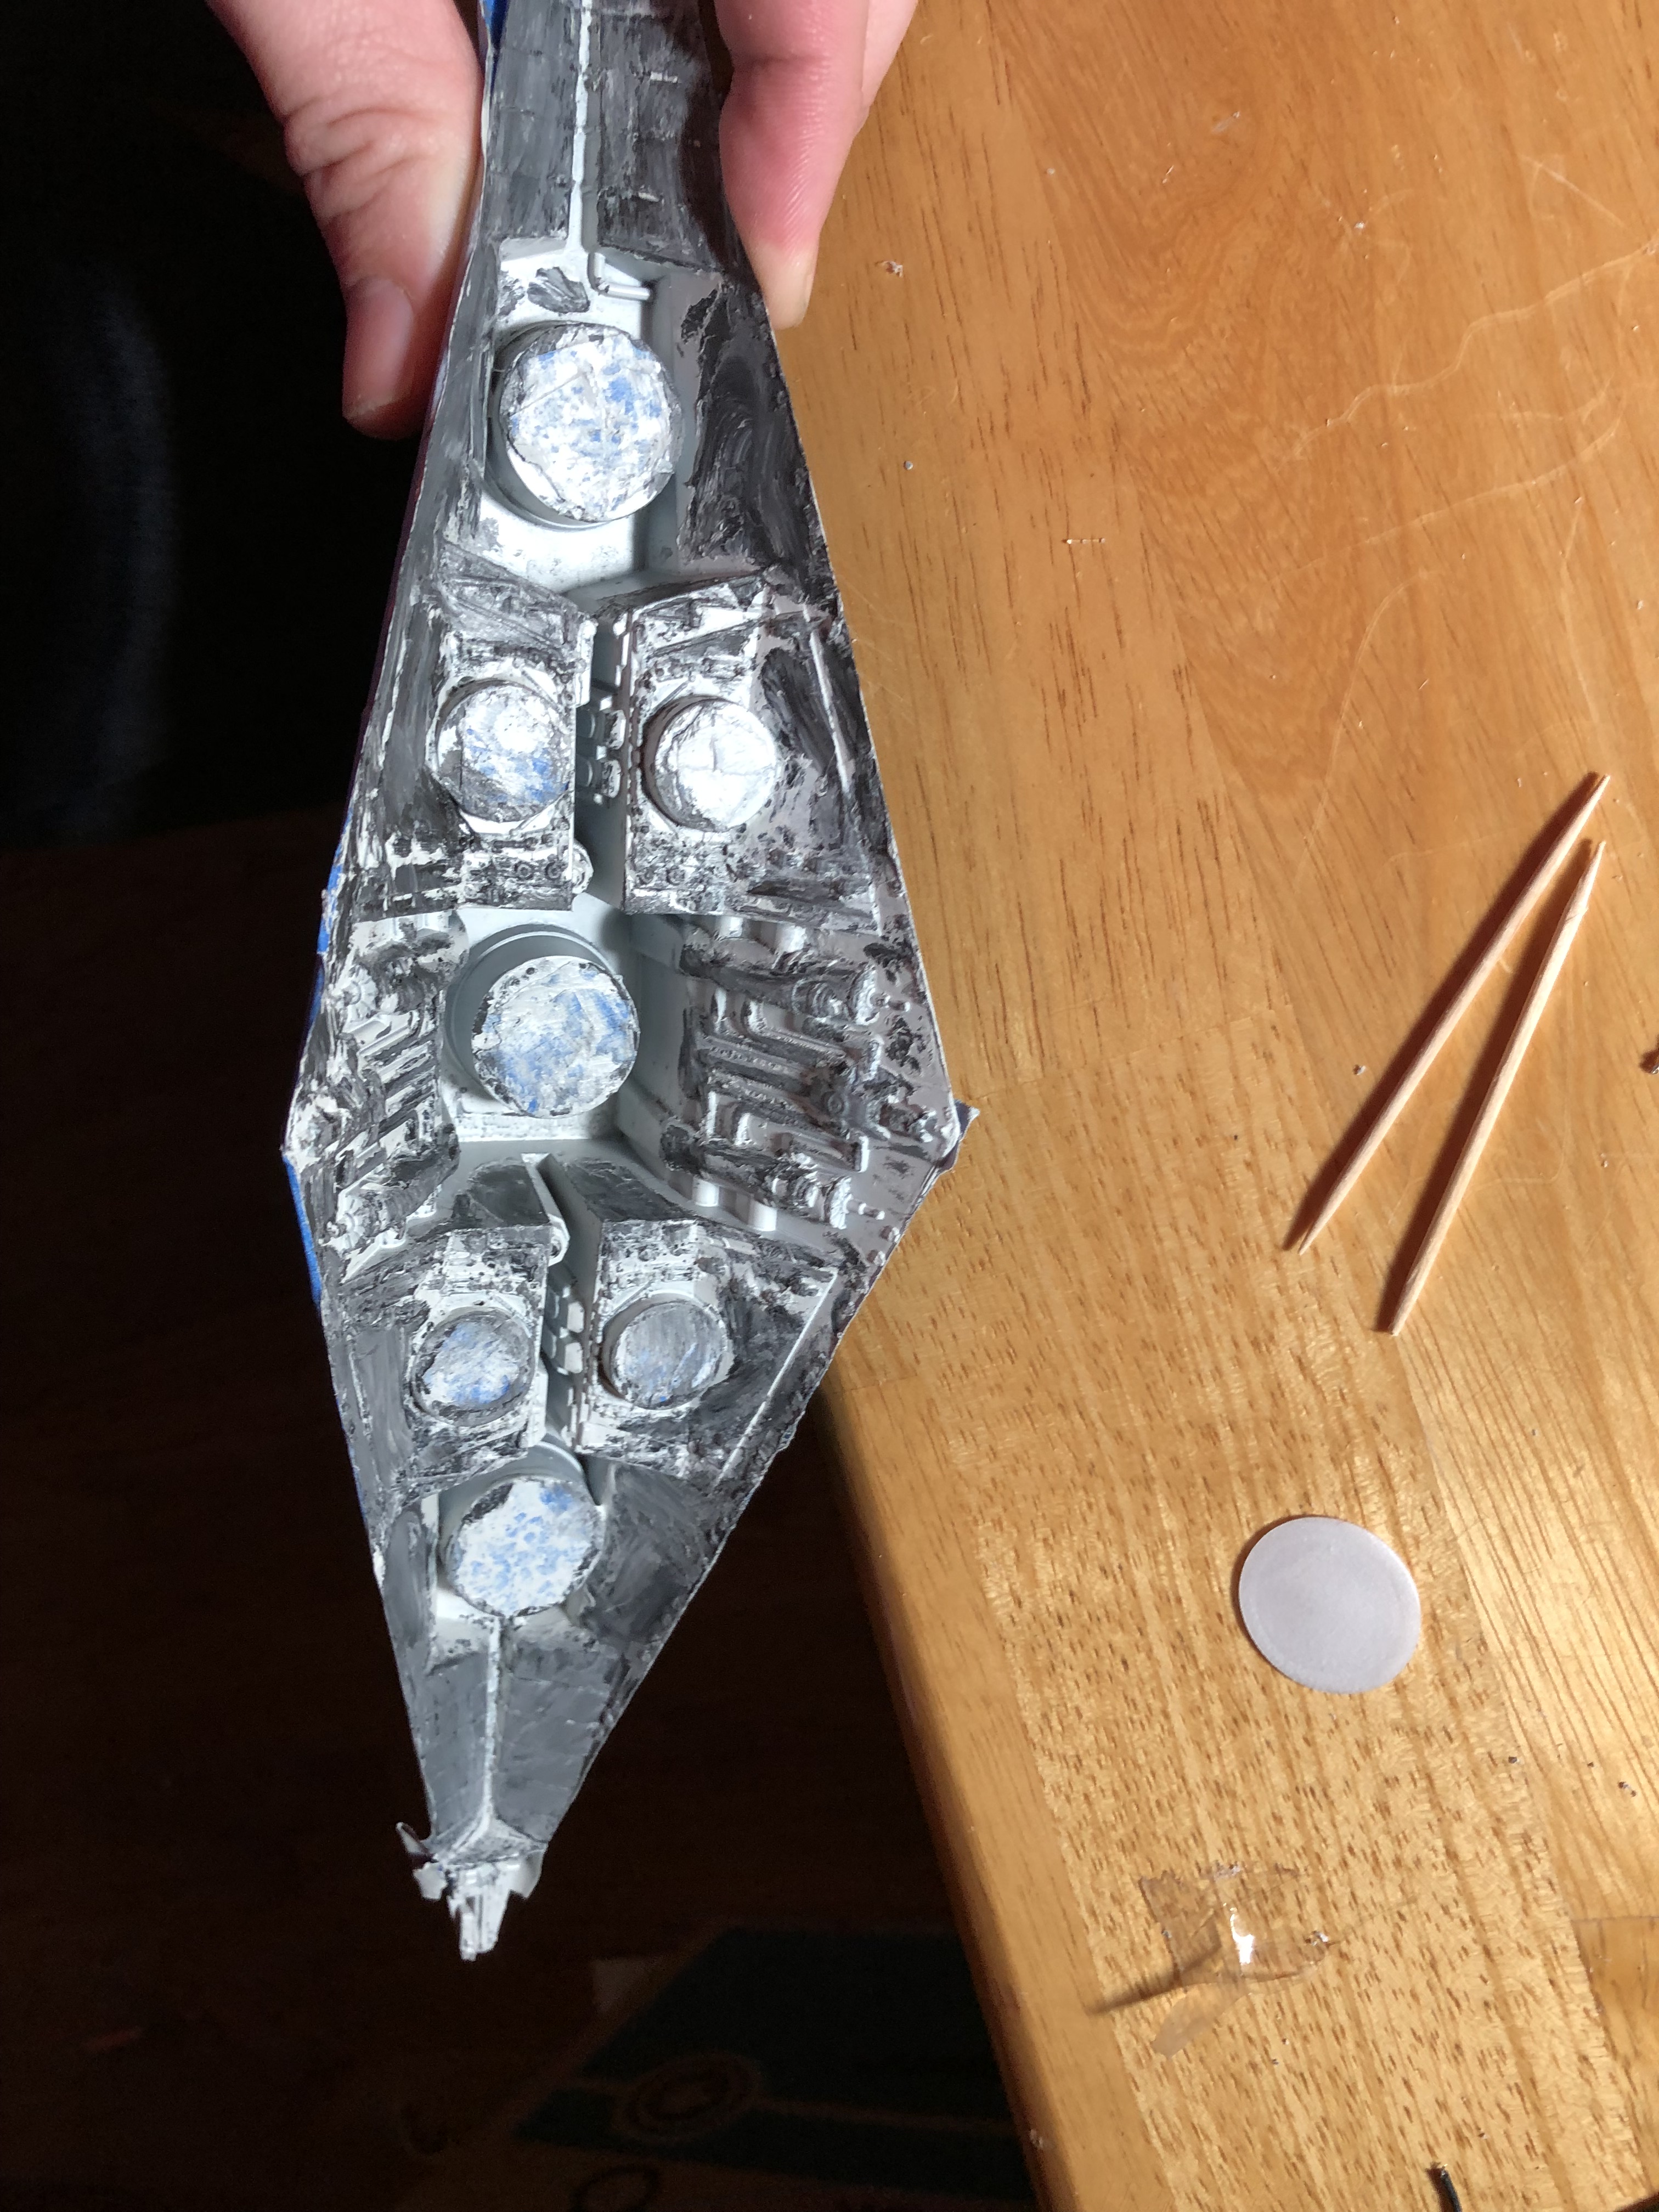
My model is progressing, although I really suck at painting it.
TOO MUCH PAINT!!!
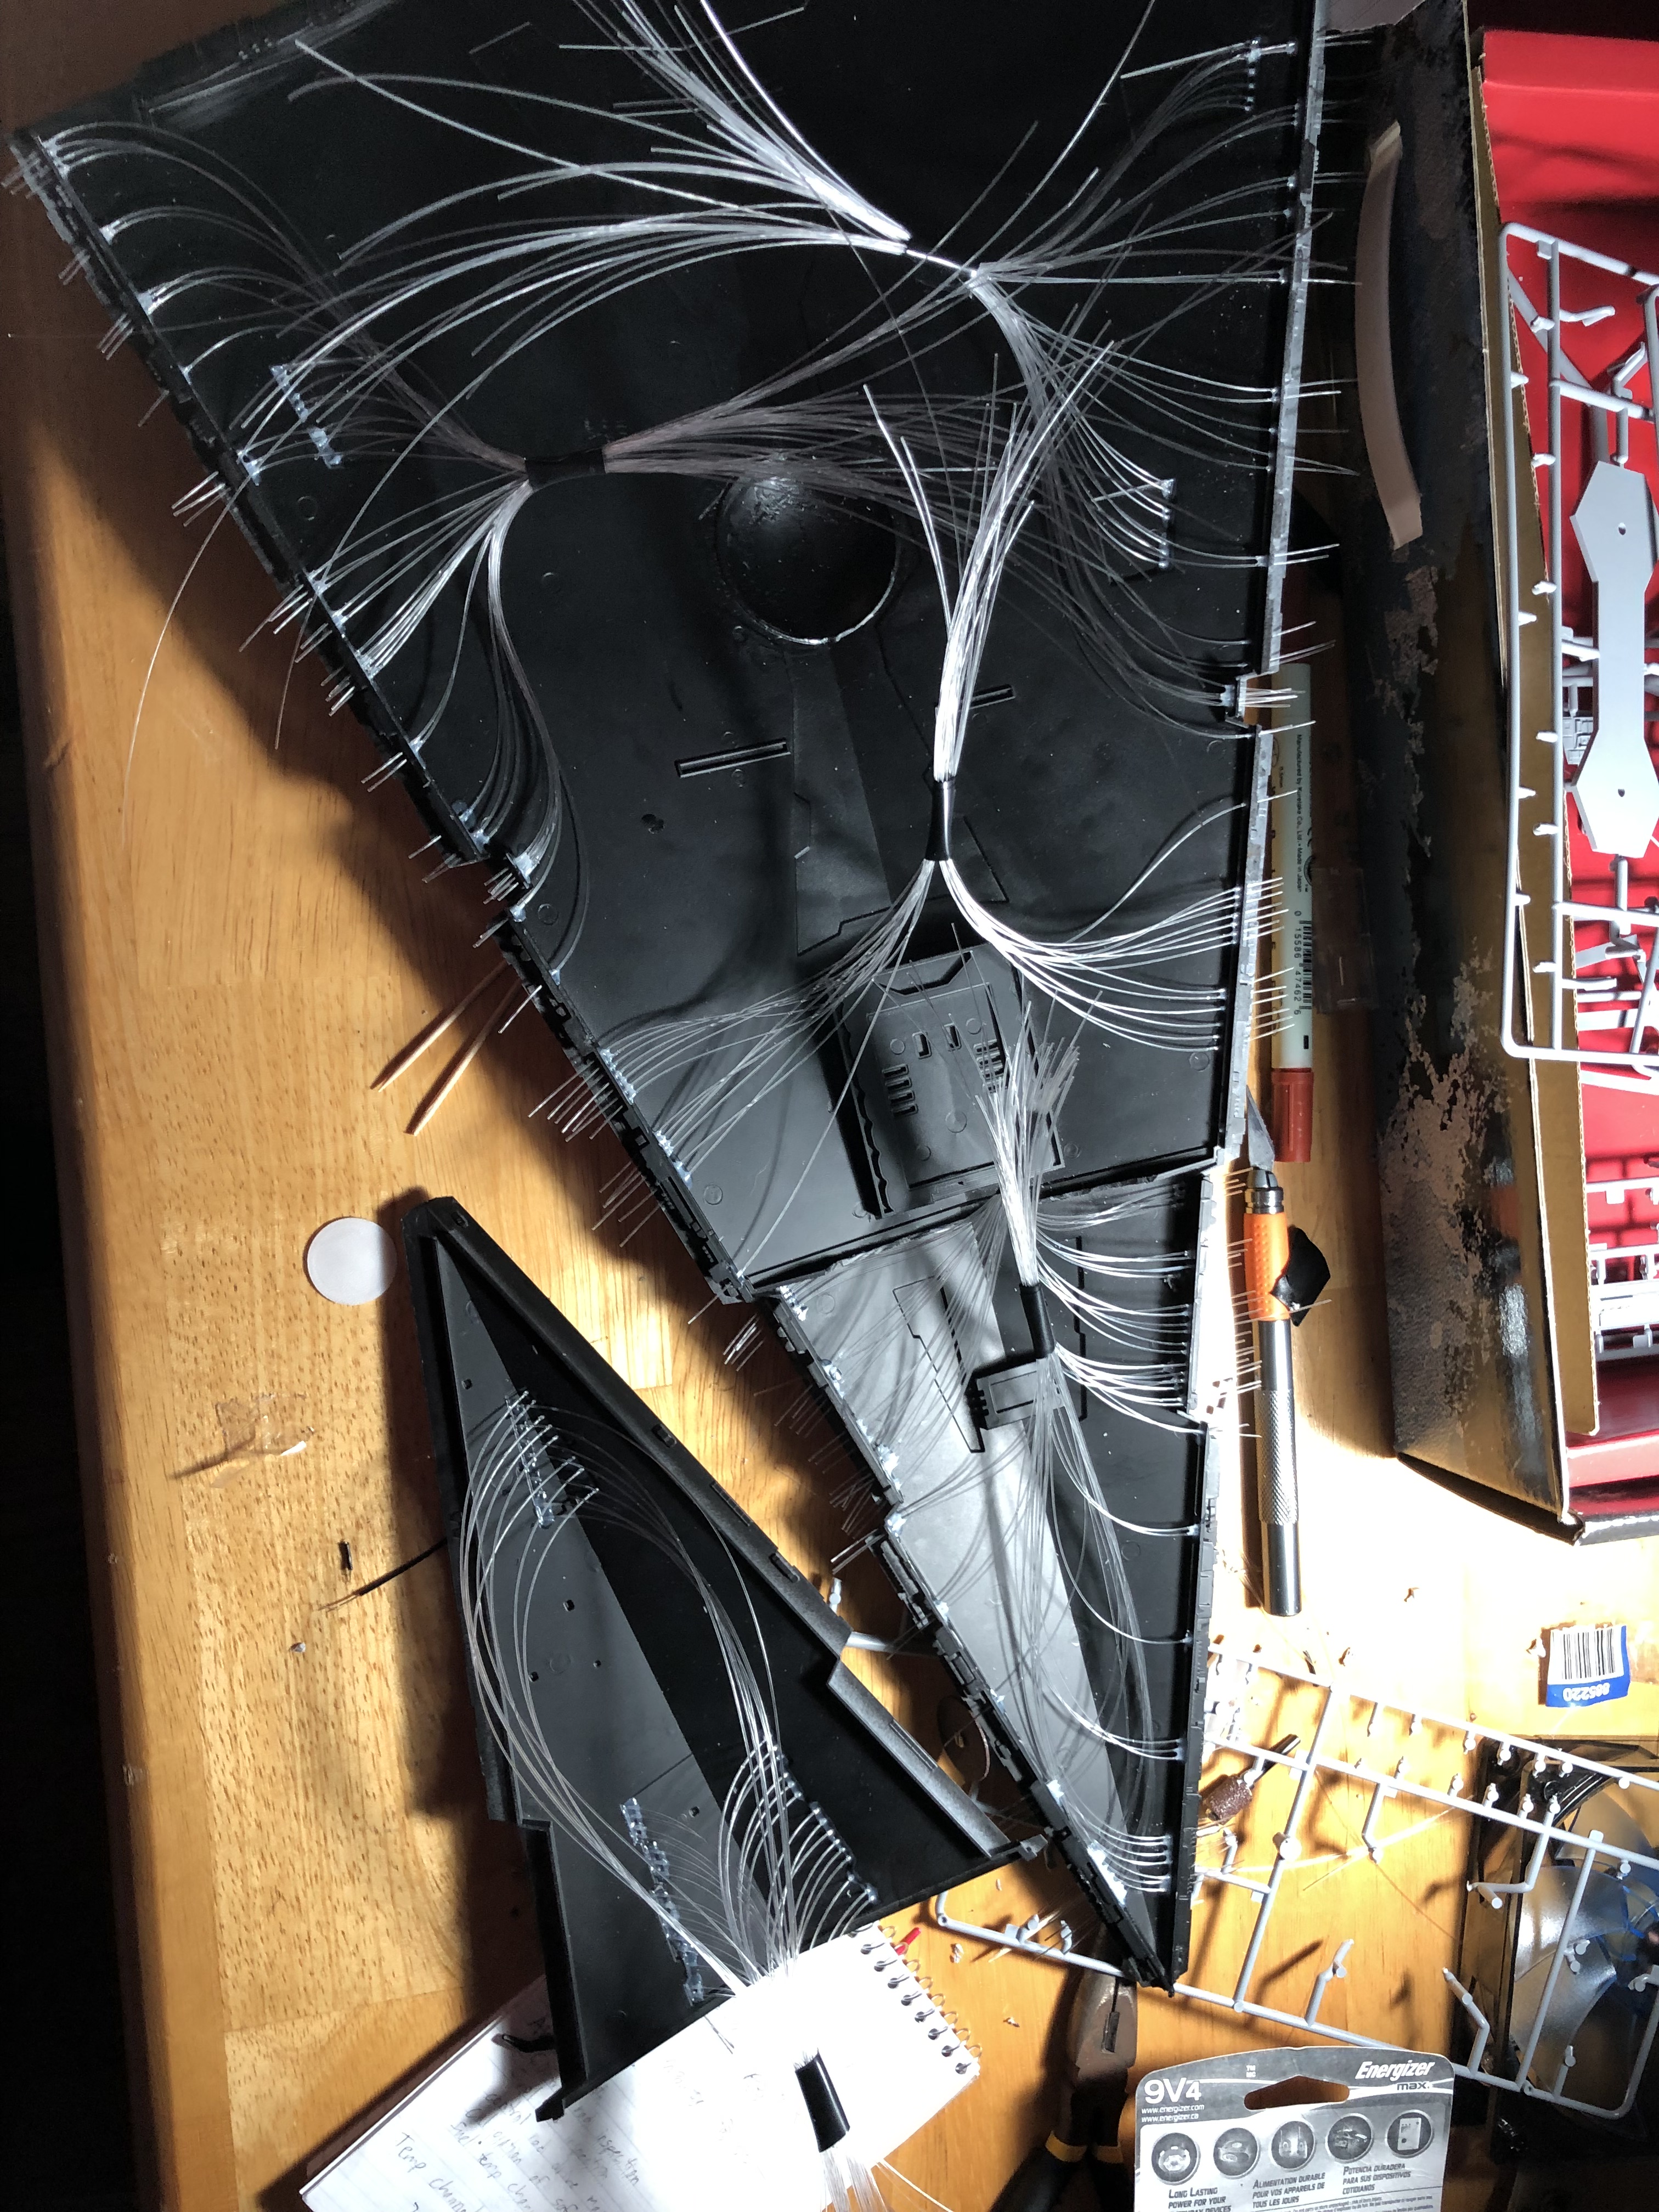
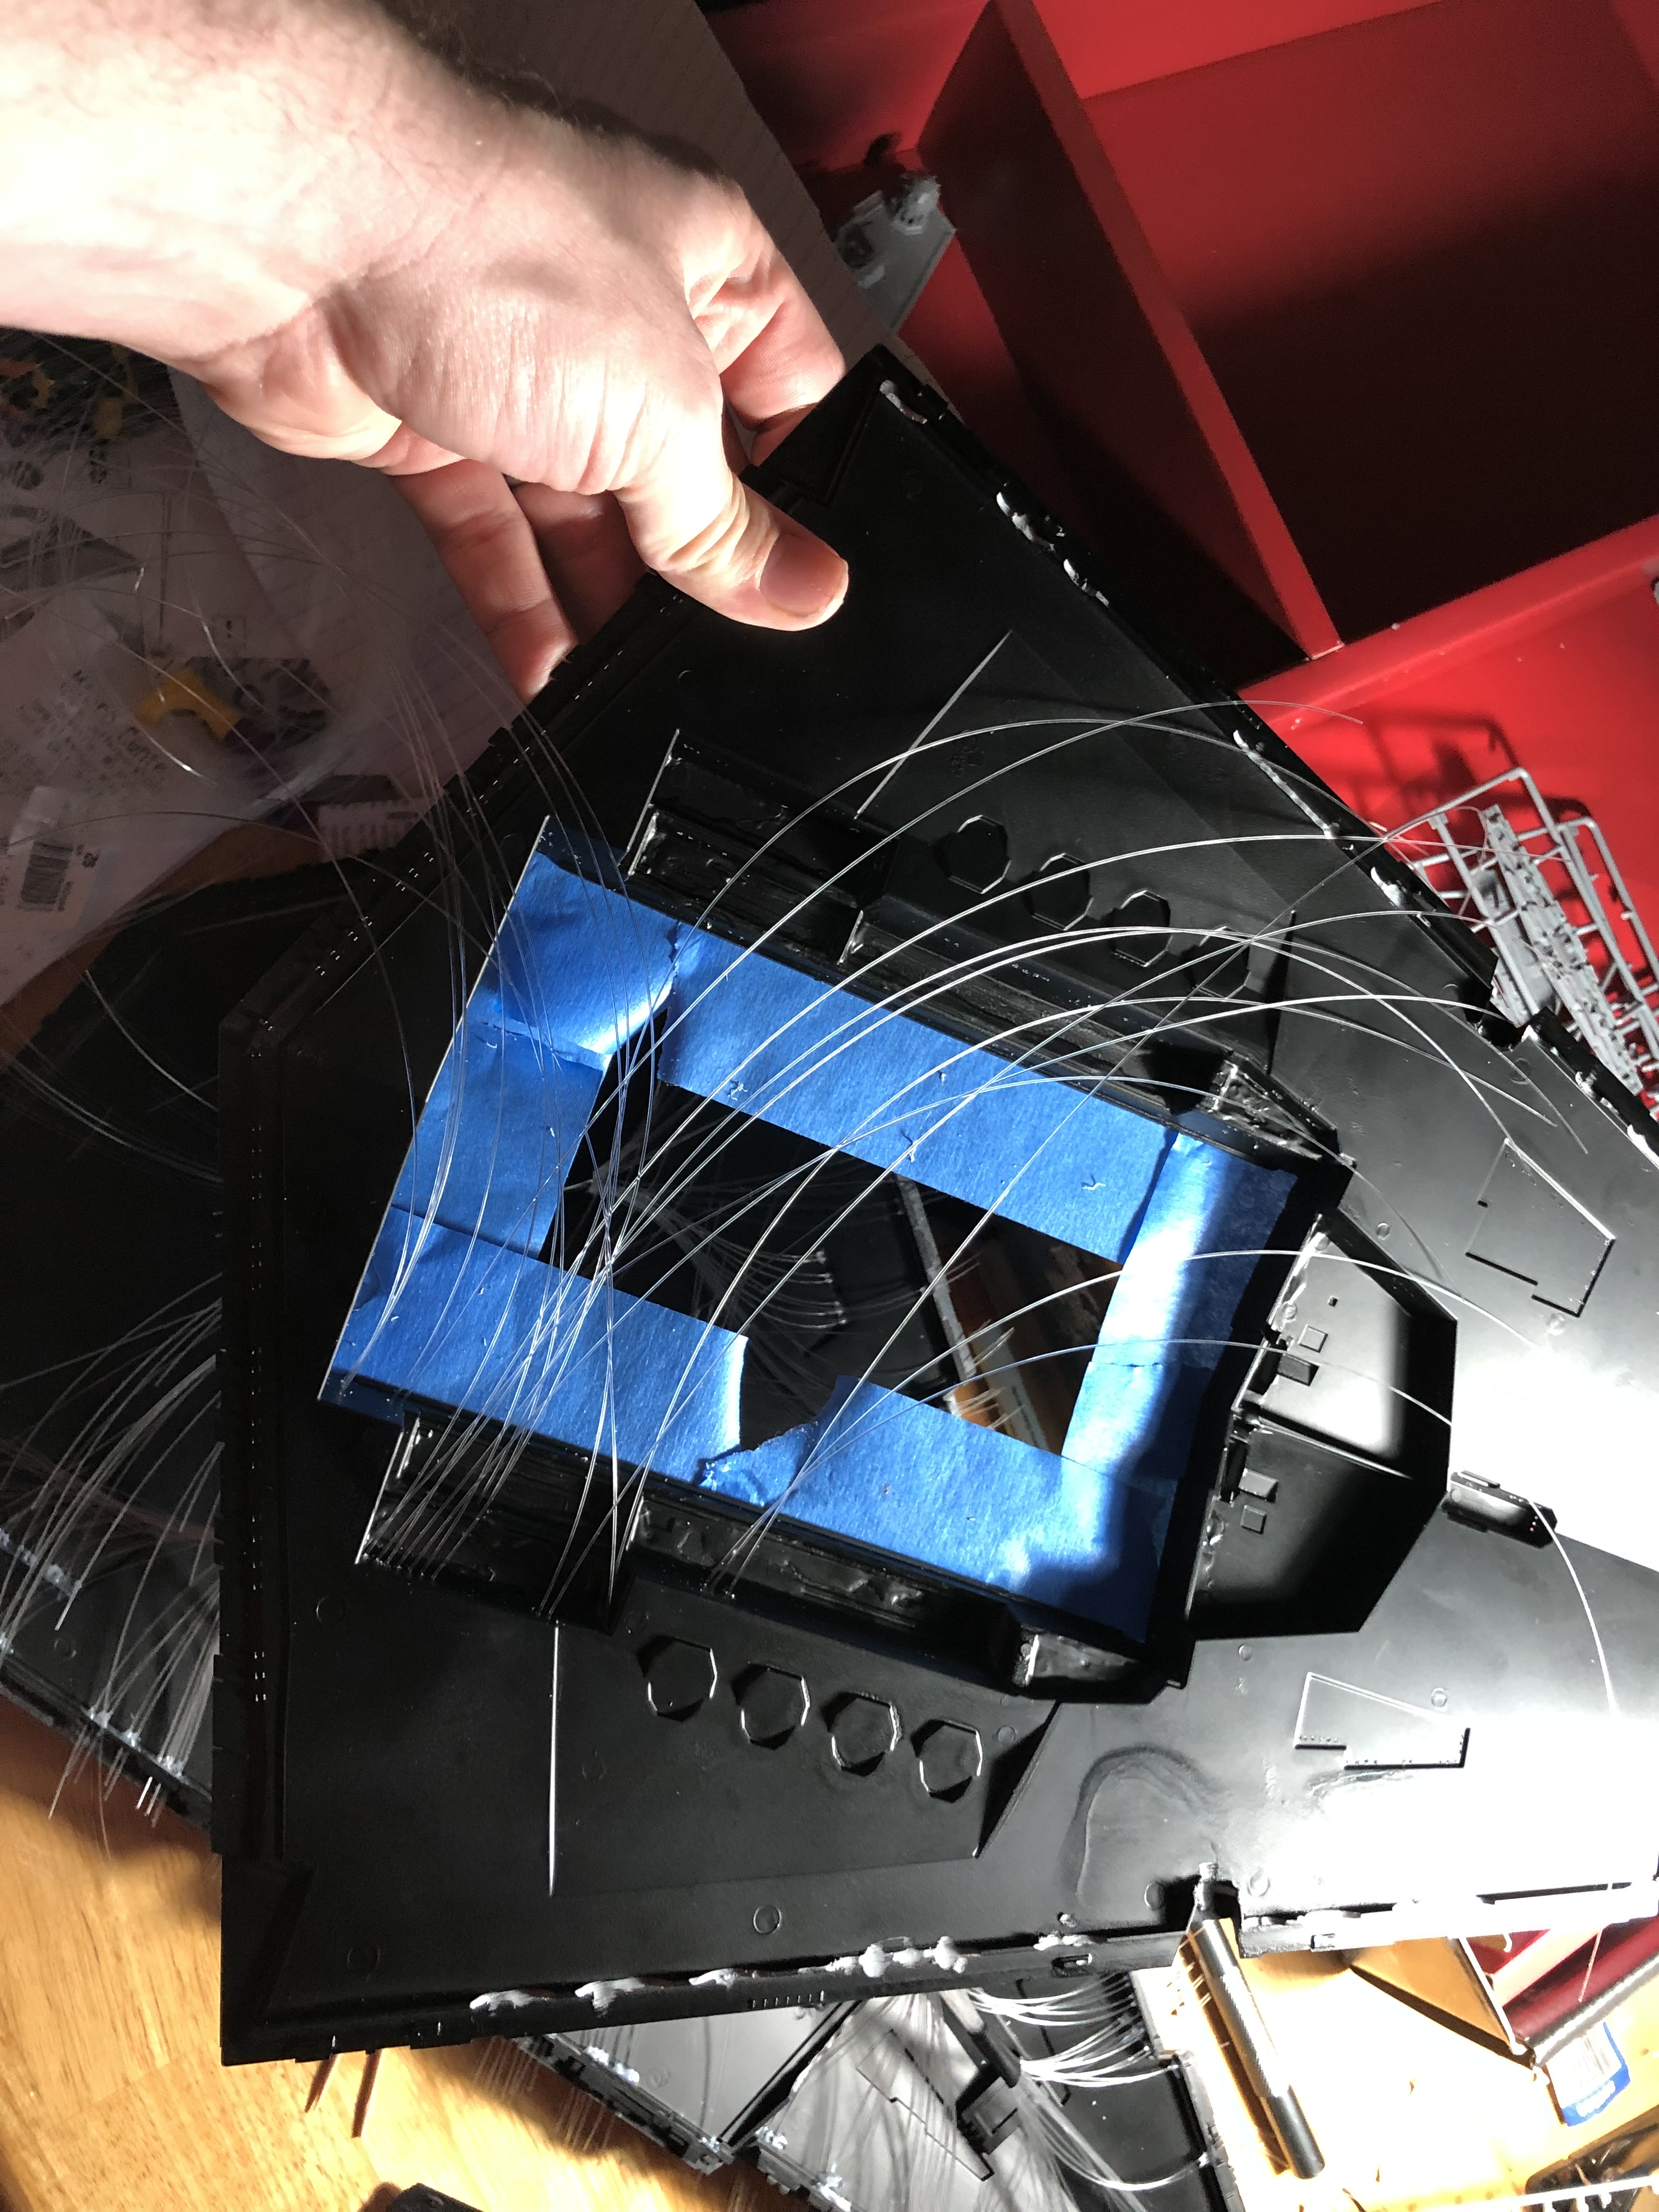
Fiber Optics installed.
Working on a new piece.
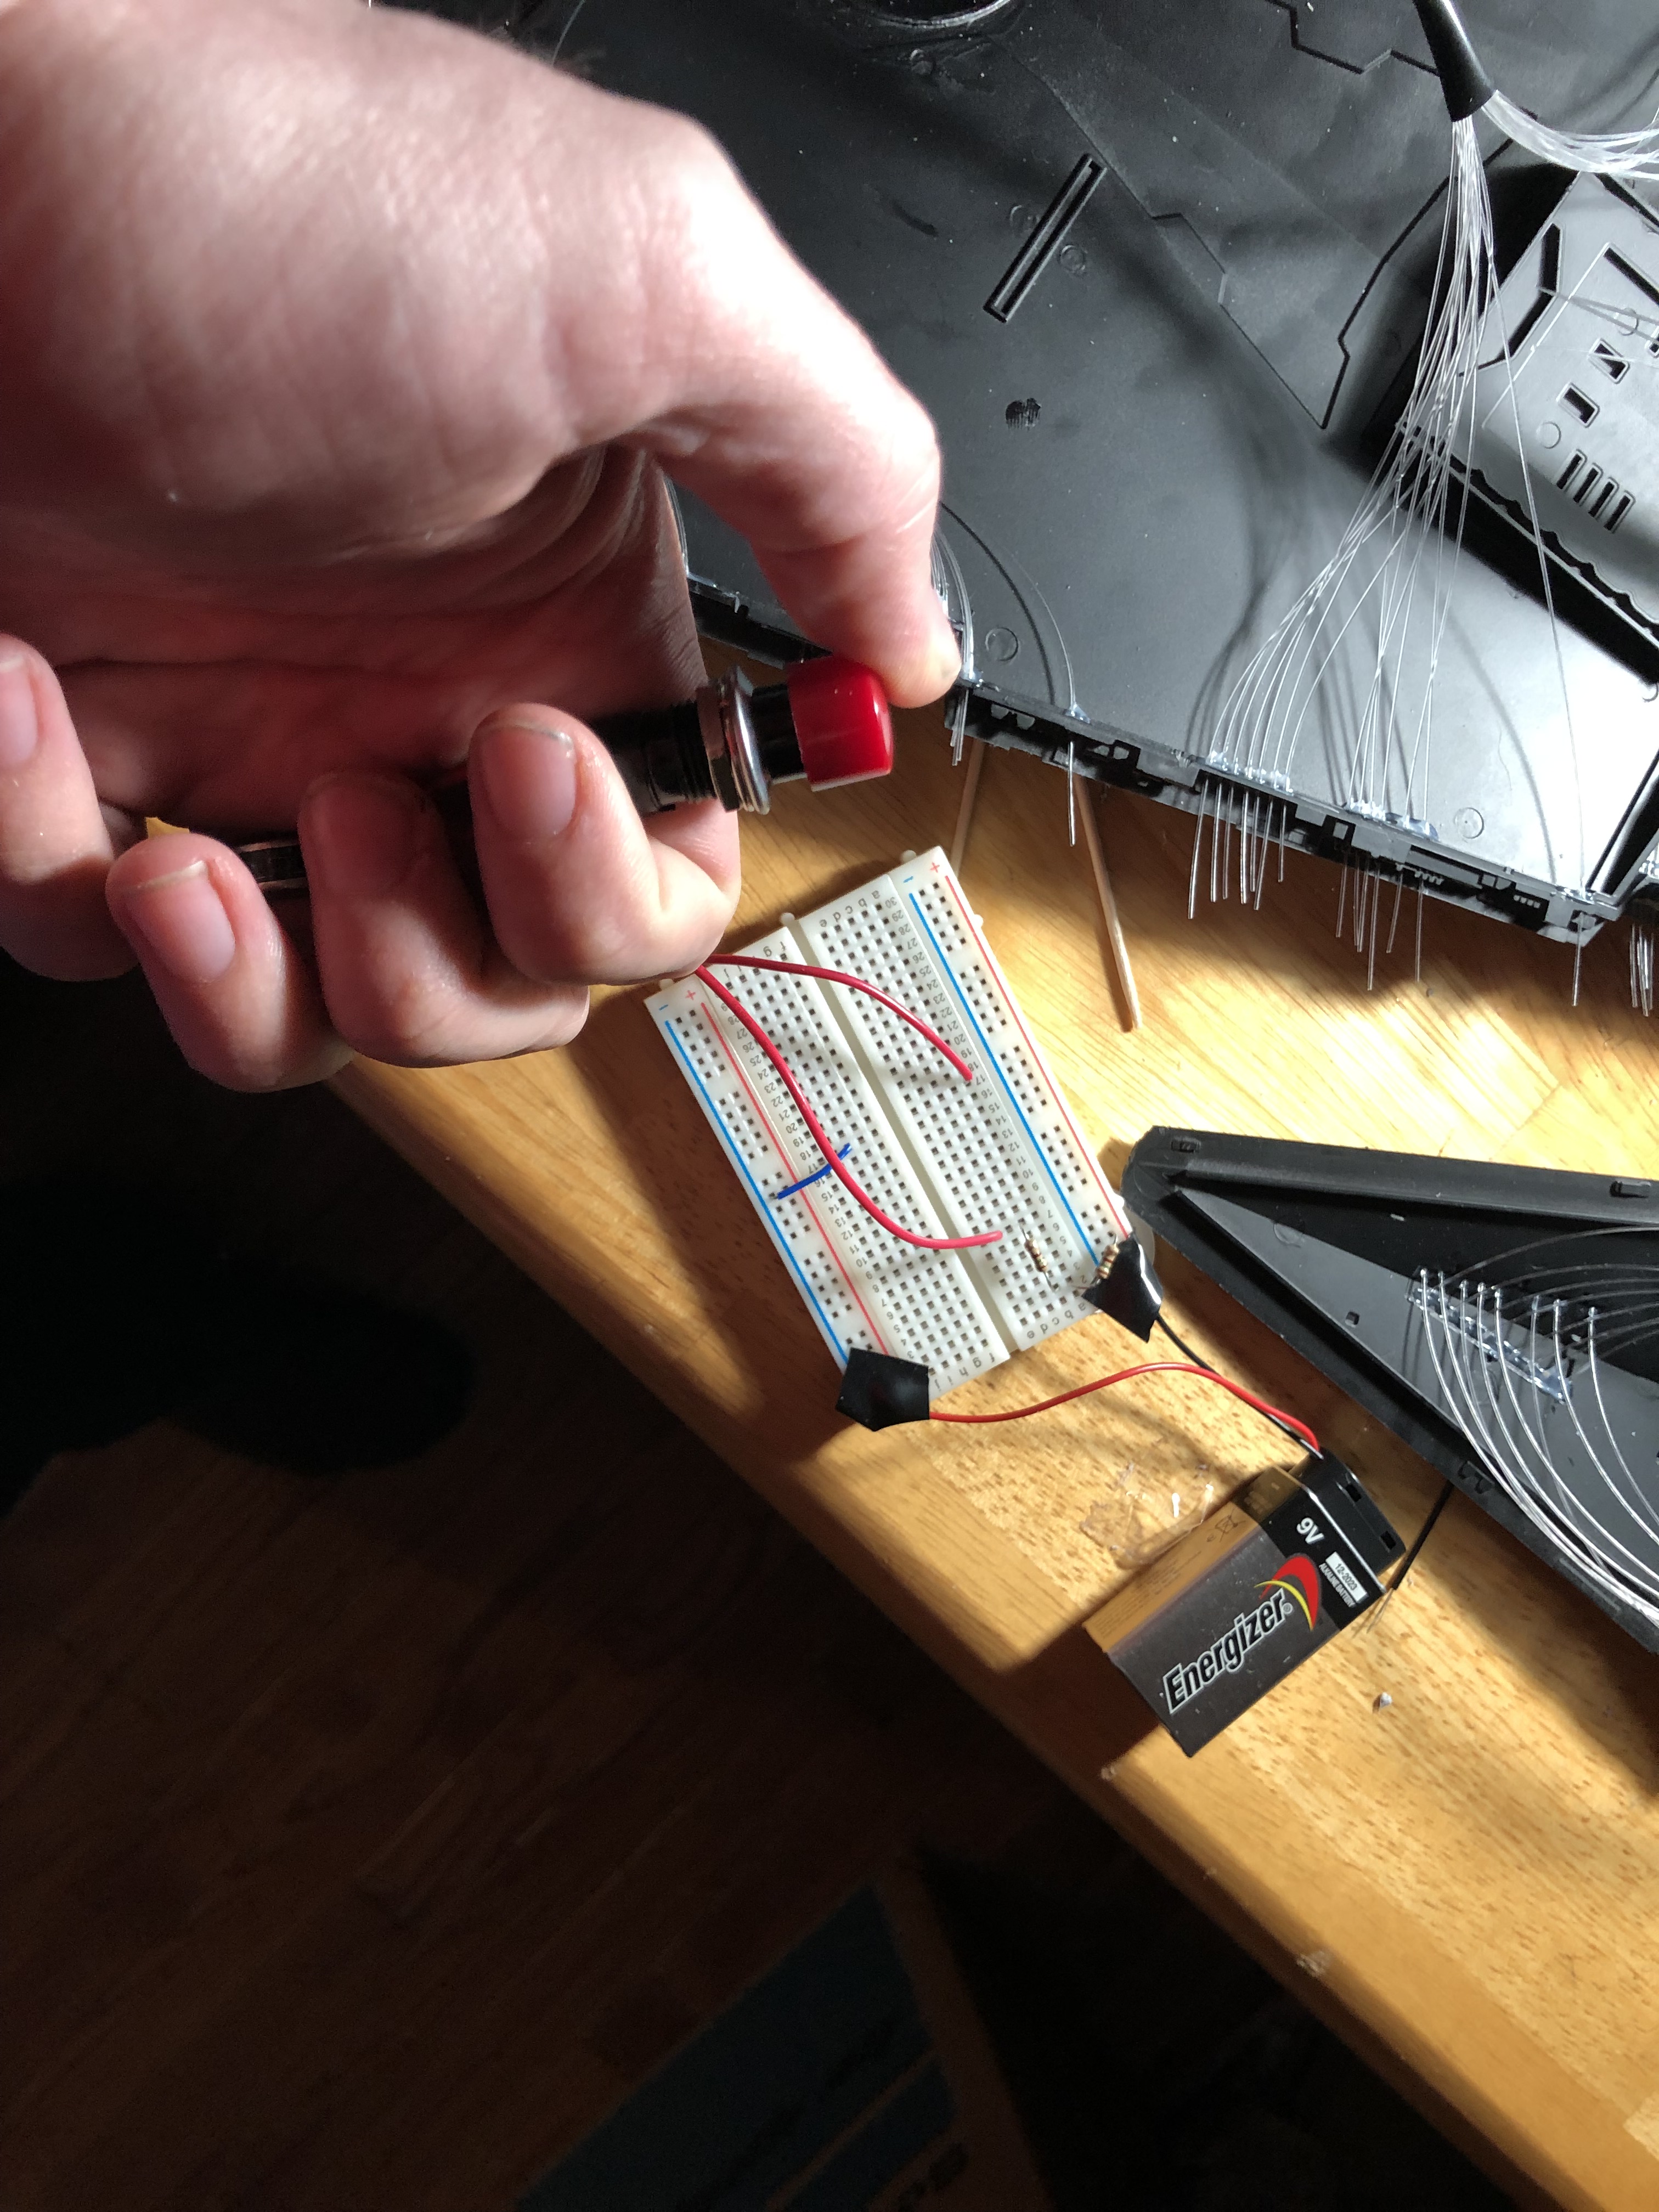
Big red button to turn it all on and off!
I am refreshing my memory of the circuits class I took. I am not going wild, just want to make sure that it all lights up. This seems like two separate projects, but if this SD model turns out, I will have a good model to base my computer case on.
I went ahead and painted the engine block, but used way too much spray paint. I then went in like a noob and tried to rinse some of it out. Really messed it up. I need to clean up that mess before I can progress any further with the model.
You learn something new every day. Lesson learned, don’t be so heavy handed with the spray paint Jeffrey!
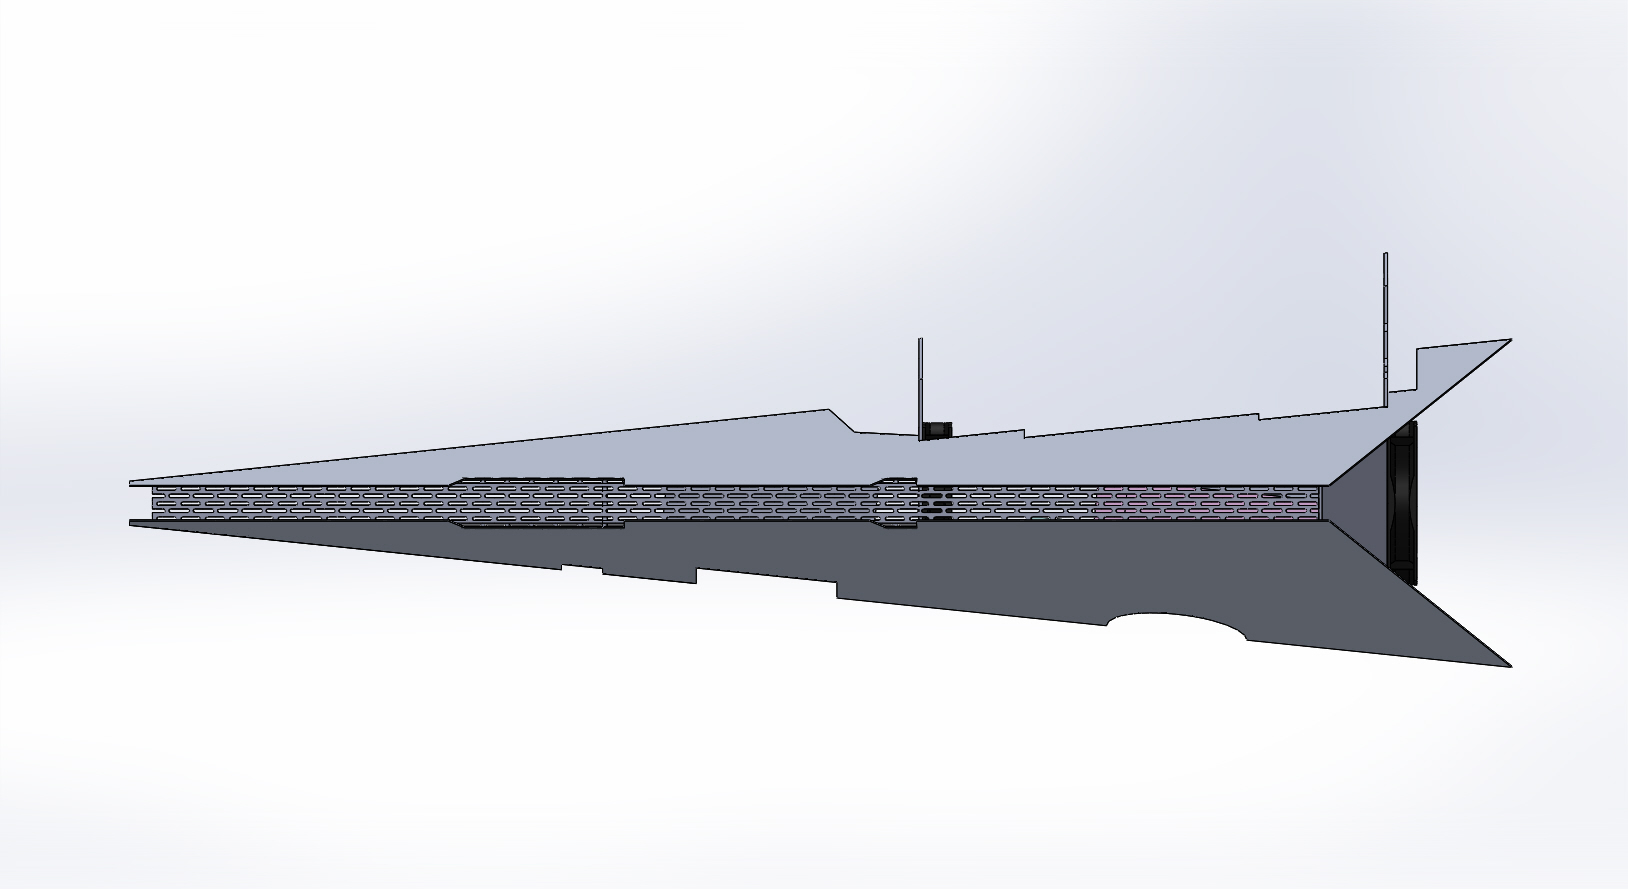
I have built my own computer before, and it is relatively straight forward. Right now all I have though is a laptop. I would like to build another computer and what better to have as a case then an Imperial Star Destroyer! This was a couple of years ago when I first started CAD drawings for my mad case. It has been a project I have played with on my laptop for some time. I have finally gotten to the point where I can go forward and start to bring this to life. Here’s what I have now.
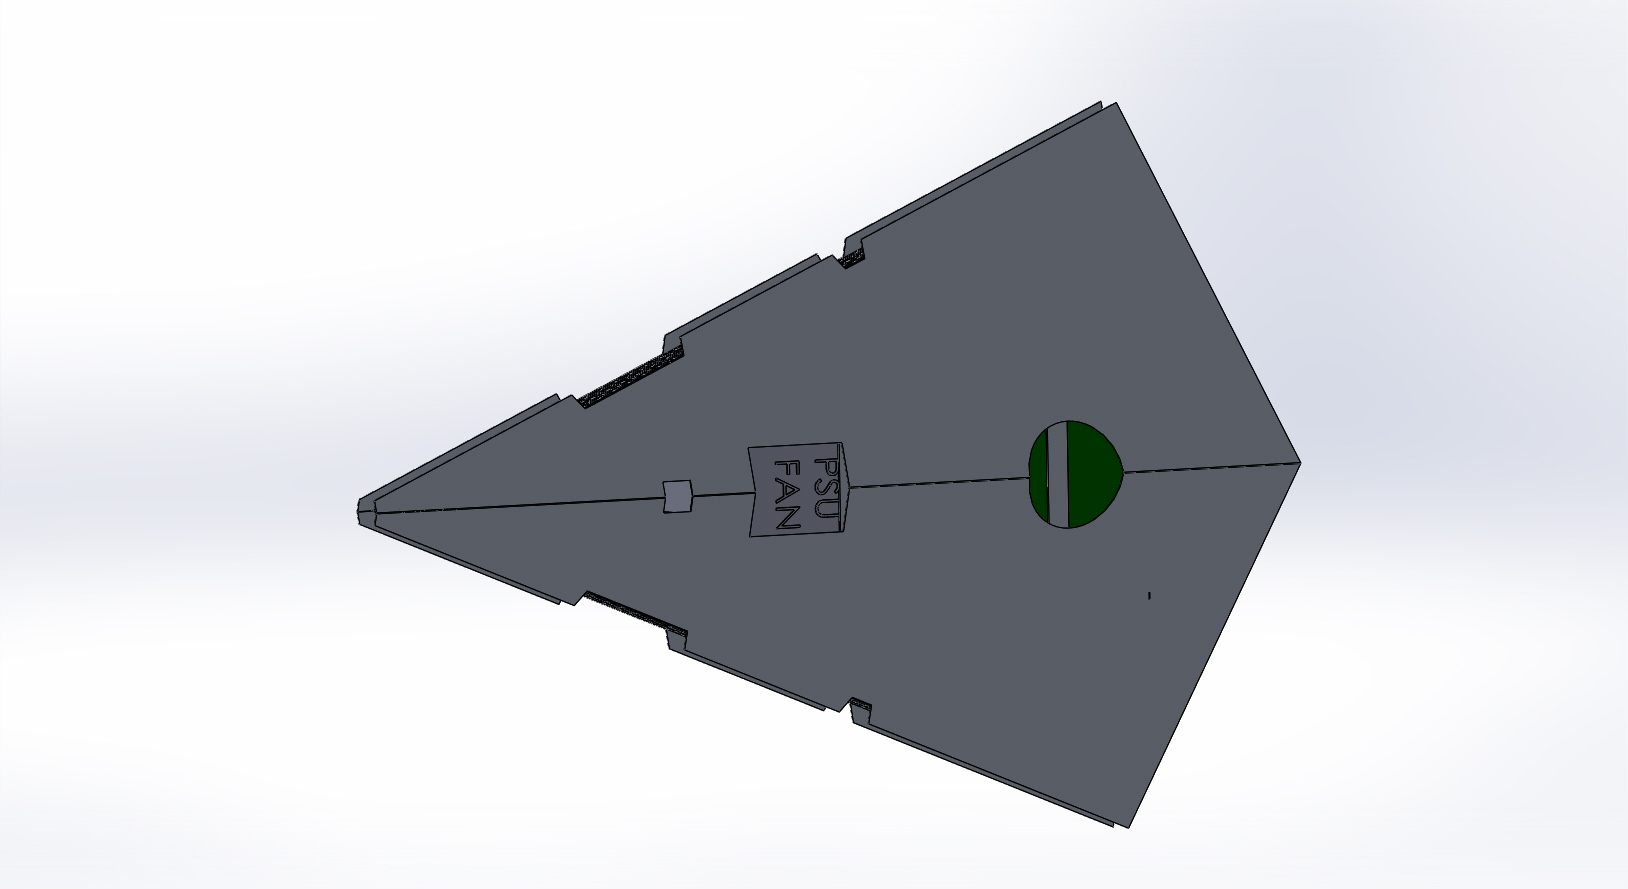
As you can see with this current iteration, I haven’t finished the design in CAD yet. I still need to complete the bridge section and think more about the supports. I am going with an air cooled design since I don’t want to deal with water cooling and I think having 140 blue LED fans on the rear would look awesome.
Right now I am going to have the intakes on the rear with the exhaust forward to provide positive air pressure to keep out dust. I am still trying to decide where things will go. My power supply is currently on top right under the bridge. I have an older drawing where the power supply is forward though.
PSU forward of the Motherboard vs above
As I play around with this on SolidWorks, I am also trying to make it look as good as possible. I got a Zvezda kit for my birthday and will be experimenting with fiber optic lighting, painting, and having something other than reference photos online of star destroyers to base my design on.
Oh snap!Going to have some fun!
Got my Dremel ready and just waiting for some supplies to arrive from Amazon. As you can see, I also have some 5052 Aluminum sitting there. I want to go with Aluminum for my case and Metal Supermarket Beltsville in Maryland was gracious enough to give me some Aluminum to experiment with. I am still waiting on my flux for that. I hear that 5052 is tricky to braze. If I can learn how to torch braze, I should be able to put this together. Assuming of course that the price of all this aluminum doesn’t bring this project to a screeching halt.
Ever since I was young, I’ve had a creative streak in me. I have always loved to try new techniques and ideas. From K’nex and paper craft, to brazing aluminum. Here are some different projects that keep me busy, when life doesn’t get in the way.
Do or do not, there is no try. — Yoda
SAM the K’nex man and SAM 2.0
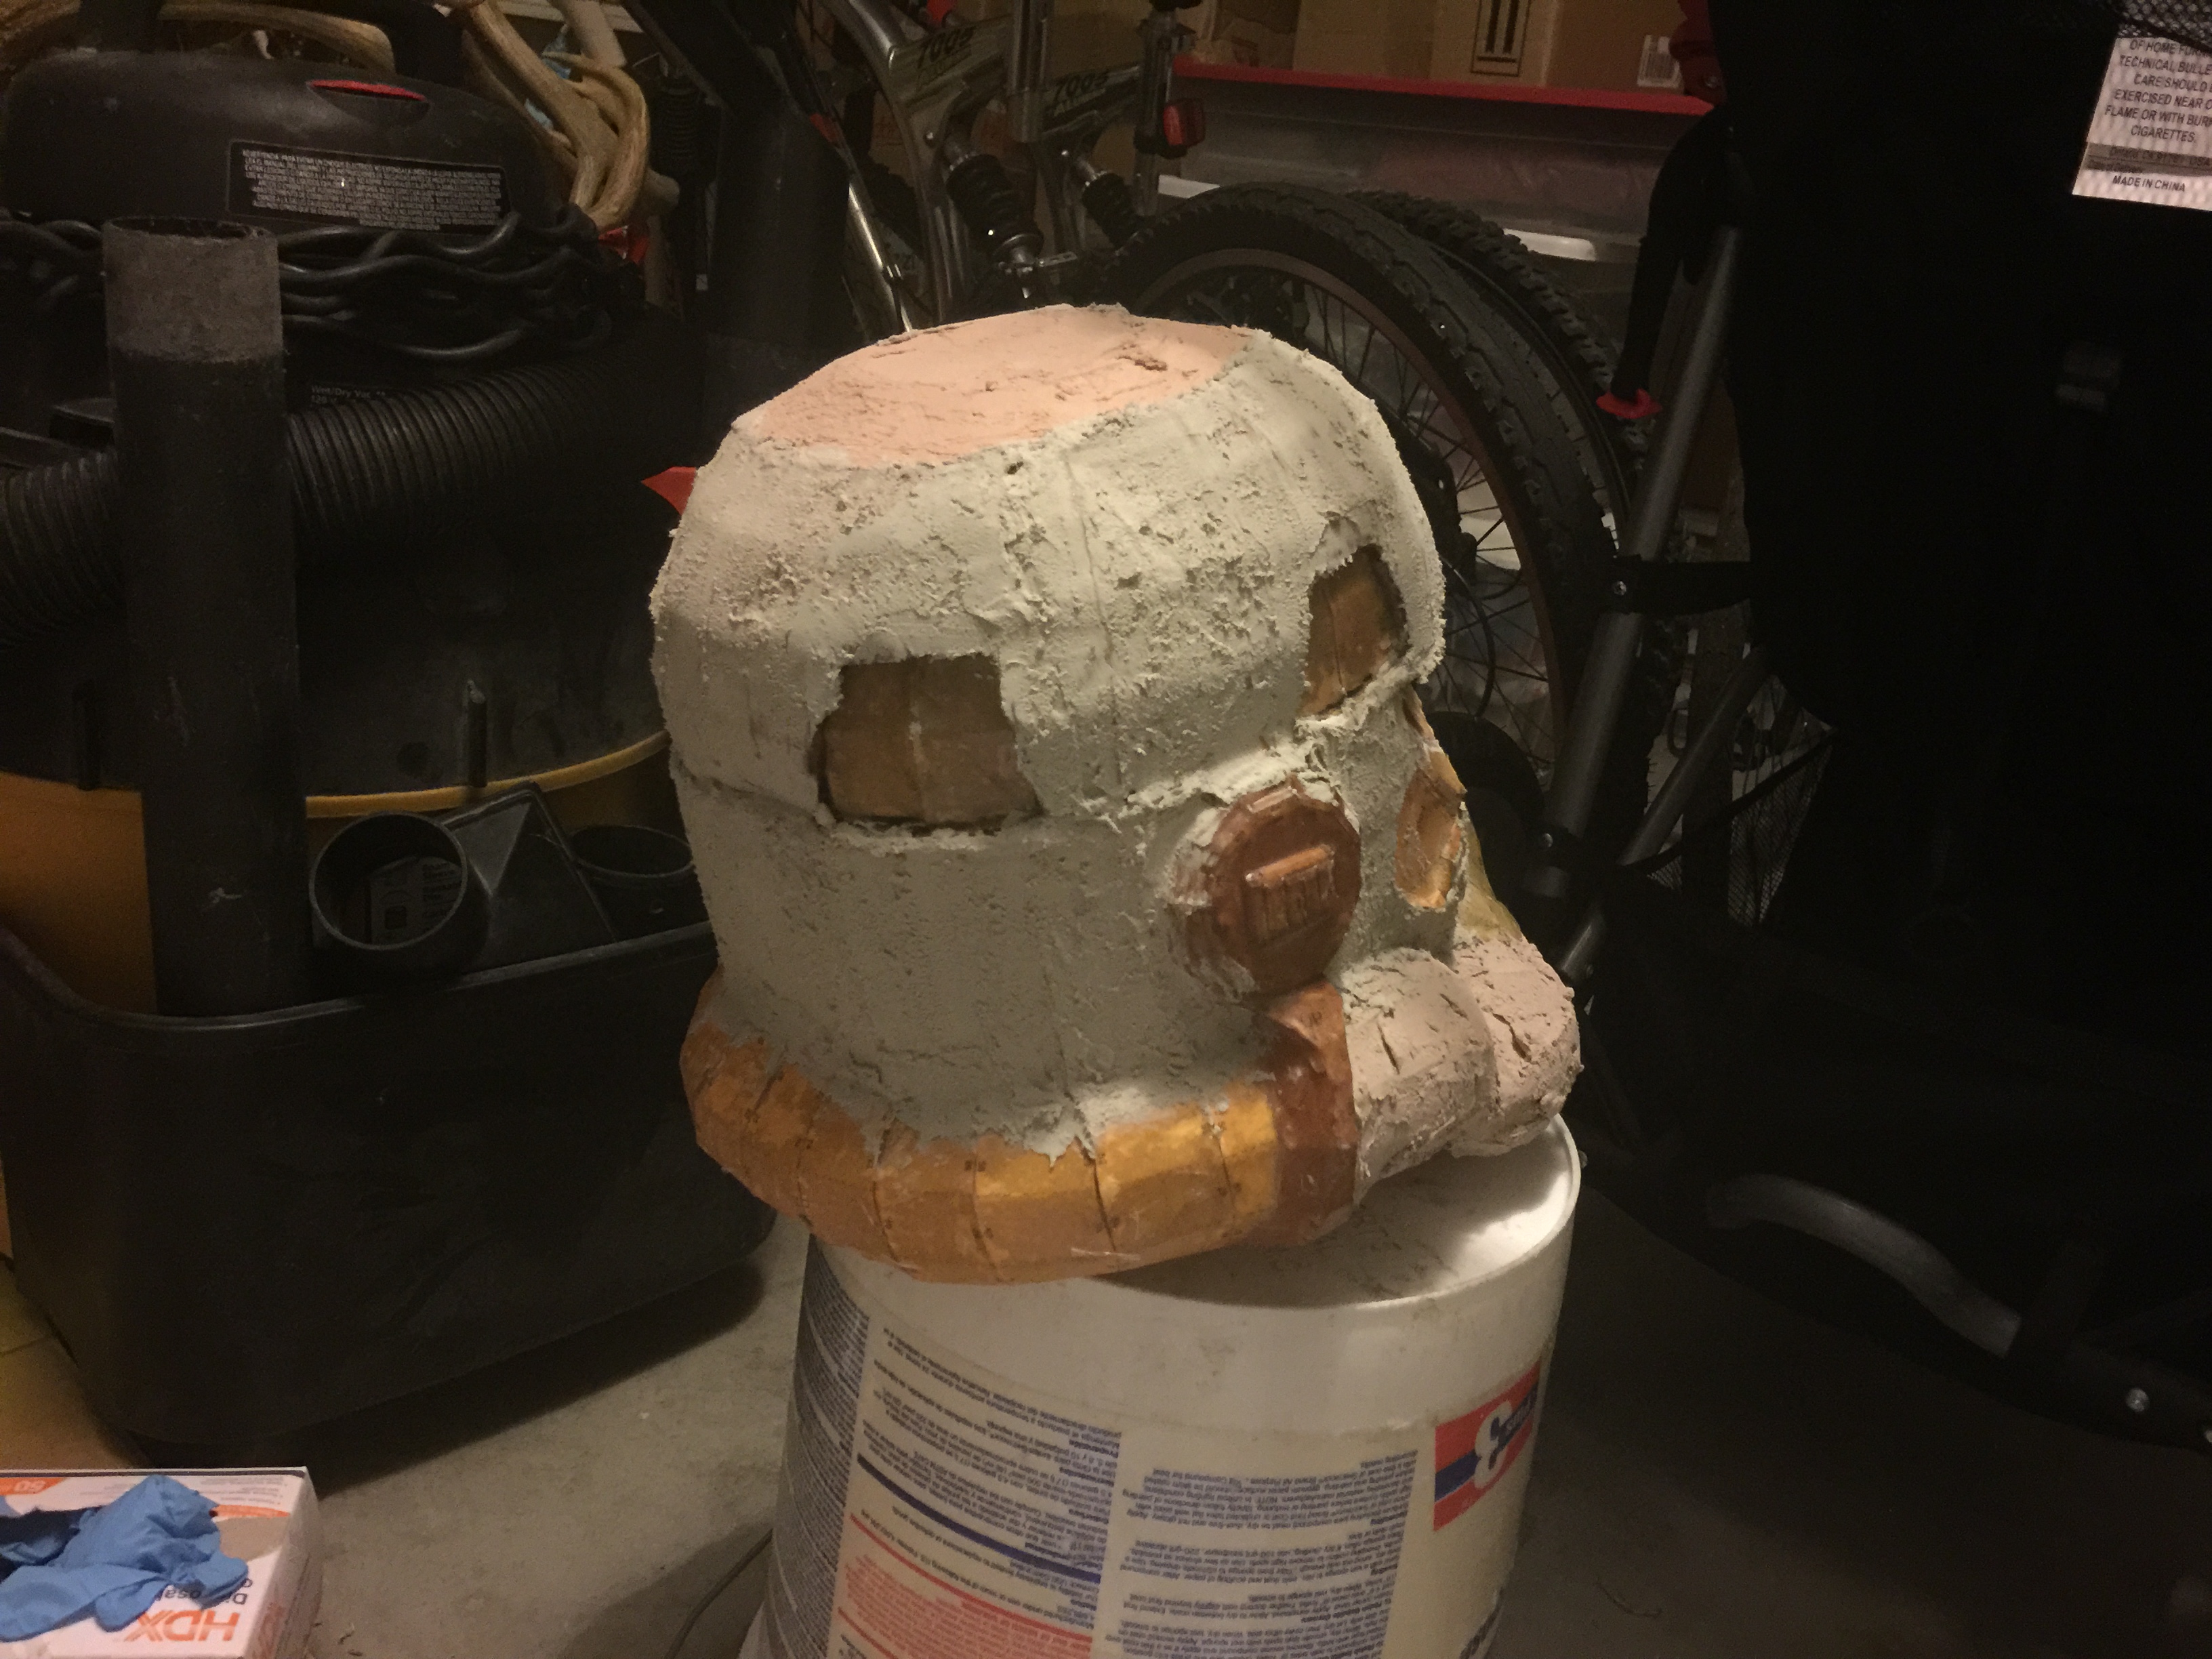
Back in 2012, I did a Pepakura project. It is where you print designs out online on heavier paper and fold them and glue them into a shape. Afterwards, apply fiberglass resin and car body filler (bondo), and you have yourself a really good helmet.
I am always thinking of new ideas. Soon, I may try my hand at Pepakura again and make a Darth Vader Helmet. Maybe I can get it cleaner than my Storm Trooper one.